Showing posts with label new house. Show all posts

Monday, August 25, 2014

Peach White-Wine Sangria (and a party)

setting up

Just about a year ago, Mr Official Taster and I moved into our very own home. This weekend, we hosted a housewarming party. I'm really glad that we finally did. For one thing, it pushed us into making some repairs/updates that we've been thinking about and putting off for the last year. We got rid of the Ugliest Light Ever, installed a ceiling fan, got a new toilet, and a few other equally sexy jobs. God bless the 70s. I imagine they have been keeping electricians busy since at least the 80s.

drinks set uplabeling, so I knew we had enough

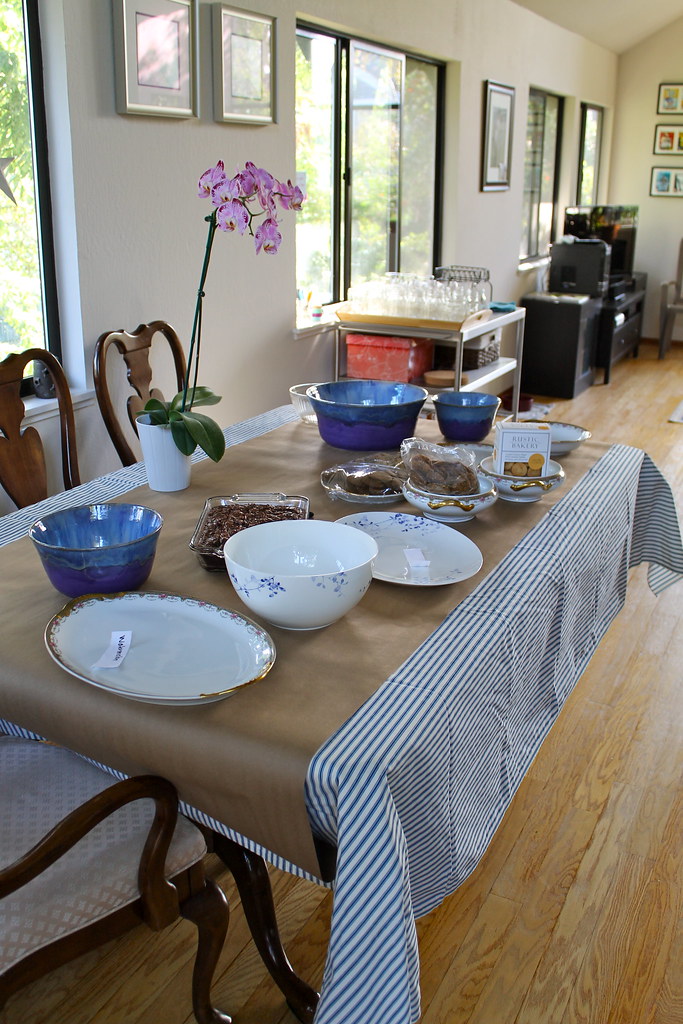
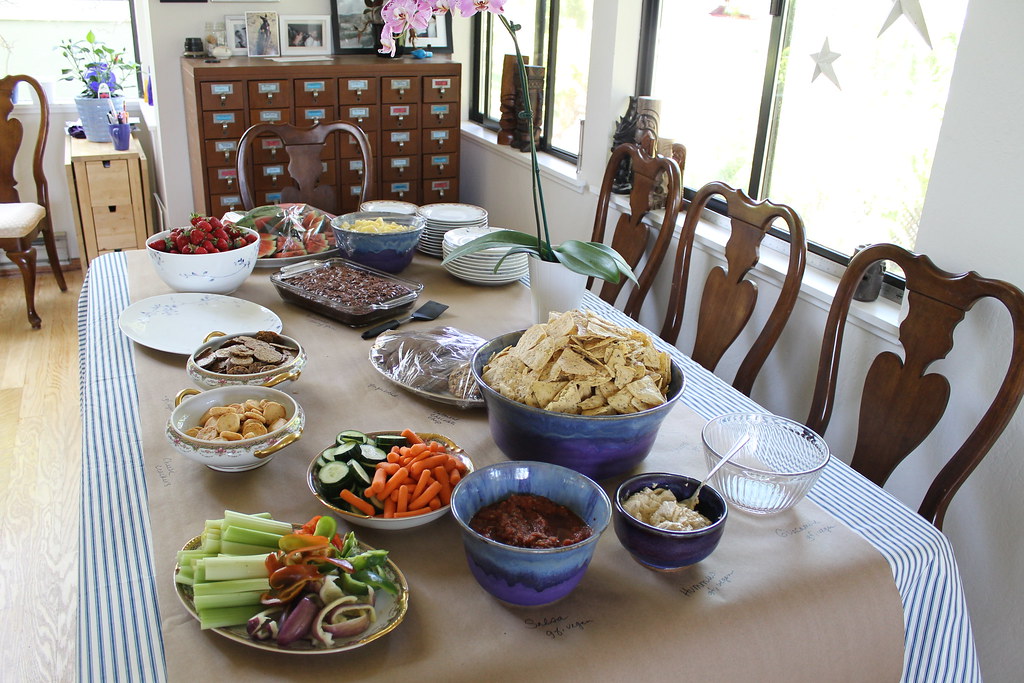
Anywho, we decided on an open house format on Saturday afternoon/evening. We encouraged people to come whenever they could for however long they could. We served drinks and snacks and generally kept everything pretty casual. I'm happy with how many people were able to stop by, and it was fun to have so many friends in the same place at once.

glass decorating
glasses

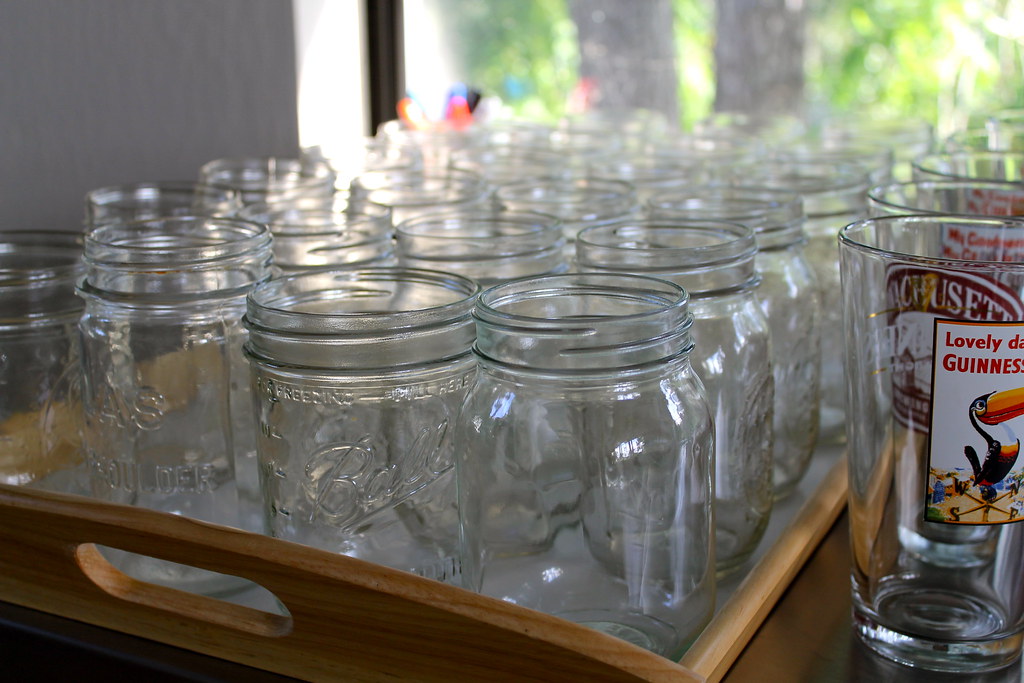
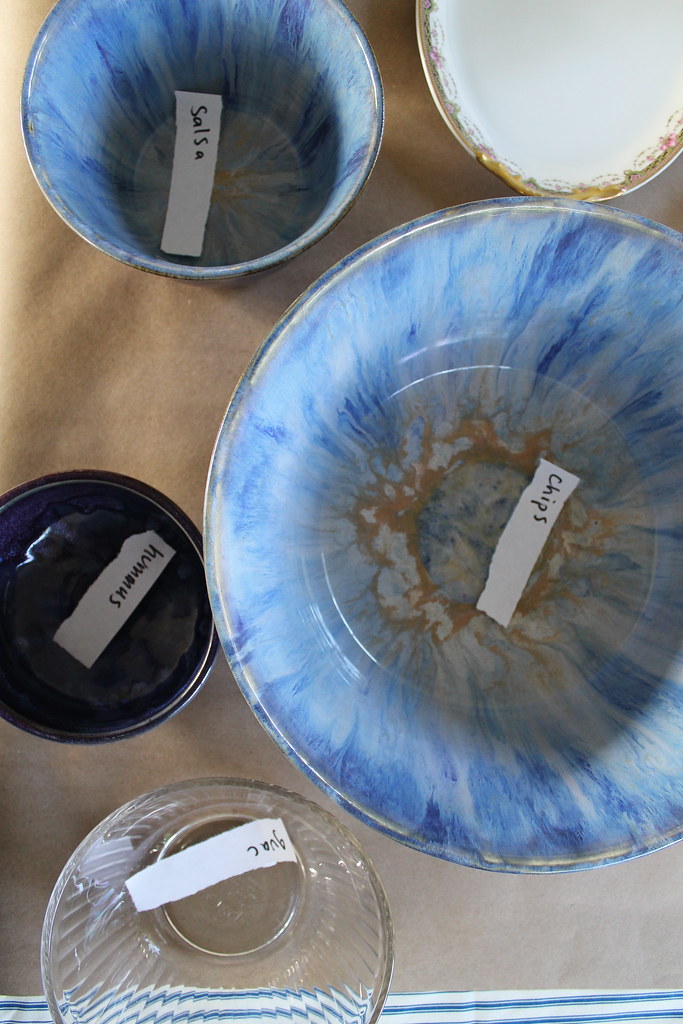
We went with just a couple drink options, in order to help keep our sanity and our budget in check. We got a small keg of Fat Tire, and I made iced tea and sangria. Food consisted of snacks like chips, crackers, hummus, guacamole, brownies, and fruit. I laid down butcher paper on top of the sheet tablecloth so I could write on it. I wanted to give people as many answers as possible without them having to come find me, so I labeled some of the dishes. You can see a bit two photos below, but my labels were things like "salsa, gf & vegan" or "brownies, dairy free" or "brown rice & seed chips, gf & vegan."

drinks station
the spread

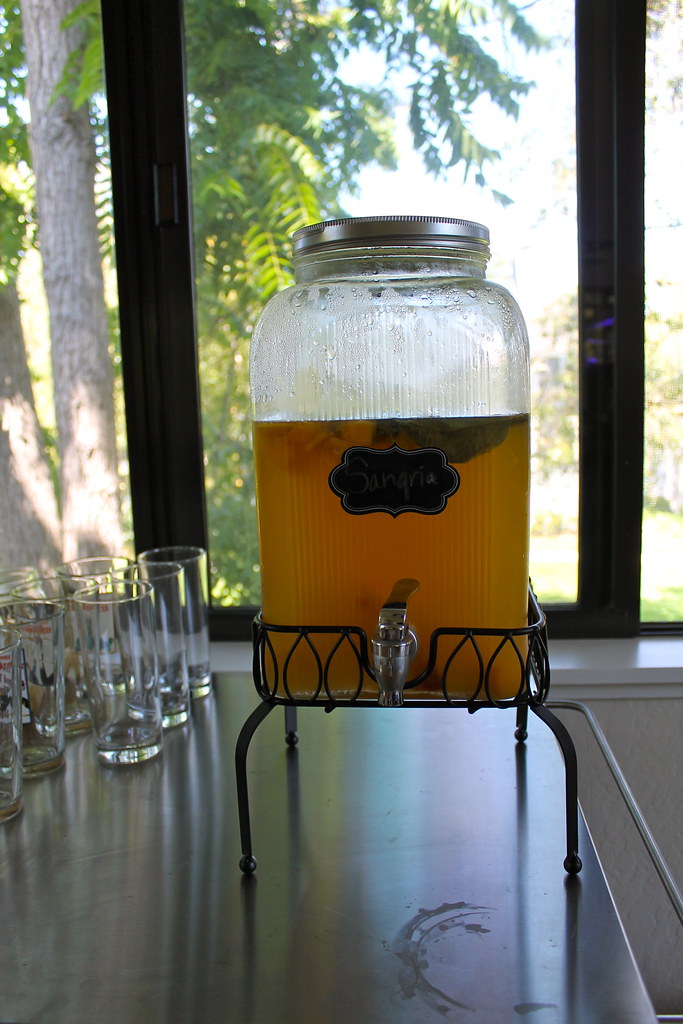
It took me a bit of research to find a sangria recipe I really wanted to make, but then I remembered (the late, great) Gourmet cookbook. It has everything in it, and I know it to be trustworthy. My requirements were that it was a white wine sangria (less stain-y if spilled) and that it used fruit I could pick up at the farmers' market. Gourmet's Peach White-Wine Sangria both sounded amazing and fit my requirements. Again and again, Gourmet has come through with a fabulous recipe, and its streak continues.

Peach White Wine Sangria | http://www.katesshortandsweets.com


Peach White-Wine Sangria
adapted, barely, from Gourmet Today

I was thrilled with how this sangria turned out, and our guests raved. The basil is unexpected and really makes this recipe stand out from the crowd. Since I can very rarely leave well enough alone, I changed the proportions a bit from the original to make it less sweet. I couldn't find peach nectar, so I used an equal amount of Orange Peach Mango Juice. Feel free to scale this up to fit your party needs! If you're feeling sassy (and you probably are), a bottle of bubbly is a welcome addition.


1 C loosely packed fresh basil leaves plus 8 to 10 sprigs
3/4 C sugar
1/4 C fresh lemon juice
2 (11-ounce) cans peach nectar (see note)
2 (750-ml) bottles chilled dry white wine
1 large peach (peeled if desired), diced

Put basil leaves, sugar, and lemon juice into a small saucepan and bruise leaves by mashing with a wooden spoon. Add 1 can nectar and bring just to a simmer, stirring until sugar is dissolved. Remove from heat and let stand 5 minutes, then pour through a medium-mesh sieve into a heatproof pitcher, discarding basil leaves. Stir in wine, peach, remaining can nectar, and basil sprigs. Chill, covered, at least 1 hour and up to 24. Serve over ice. pro tip: want to be fancy and keep your drink from getting watered down? Make wine ice cubes! Plain wine doesn't freeze super well, so I filled my ice cube trays about half way with water, then poured in wine to fill them the rest of the way.

Tuesday, January 21, 2014

How to Spray Paint a Doormat

homemade spray painted doormat


This was one of those posts that was supposed to be up last month, but since I didn't get it up then, you get it now. I was originally inspired by Young House Love to create my own winter/Christmas doormat for our new home. I wanted a bright red mat that spelled out "JOY." But you know what I learned? Js are really, really hard to make with painters' tape. So I went simpler, and I've still been happy with it. There's probably a lesson in there.

And although this was supposed to be a Christmas post, the you can use this technique to make a door mat for any season or event you'd like (or even no occasion). Add stems and a few leaves and this snowflake design turns into flowers. I think you could make firework-like bursts for the summer holidays or a sun. Birthday candles or a menorah would be pretty simple, and, excluding tricky letters like "J," spell out names, make a monogram, or try simple words. think: love, fall, boo. Stripes, chevrons, squares, crisscrossed lines/grid are easy straight-line designs. Of course, you could be fancier than painters tape and buy or make a stencil for more elaborate (or, ahem, curved) designs, letters, or even house numbers.

step one

And it's easy. Get your spray paint. Make sure it's a good quality (not the $2 can please) and be sure it is for indoor and outdoor use. Otherwise it won't hold up. I used Rustoleum. Start with a blank mat. I picked mine up at IKEA, but they have similar ones at home improvements stores, as well as places like Target or Home Goods. On a dry, non-windy day (double check your paint can for temperature requirements), spread your mat out on a surface you don't mind getting paint on (like a lawn) or protect your work area with craft paper or newspaper.

step two of how to spray paint an IKEA doormat

If you're using two different colors, spray your "under" color (in my case white) evenly over the entire surface. It will take you a few passes to make sure you have even coverage. Take your time, but don't worry if it's not perfect.

of how to spray paint a door mat

Follow the directions on your spray paint for drying time. I waited a full 24 hours. Tape off your design. I just eyeballed it and tried to make all my snowflakes a little bit different and all slightly different sizes. Remember, the parts you are taping will remain the under color. Be sure to press firmly, especially around the edges for crisp lines.

step four: completed door mat

Spray on your top coat. Again, go for even coverage. It's better to go light and have to go over the area another time or two than just pour on the paint. Wait for the paint to fully dry (I waited another 24 hours). Remove painters tape and enjoy!

DIY spray painted door mat

Since we don't have winter weather here in sunny California, my mat didn't have to hold up to rain or snow, but according to Sherry and John, theirs did.

spray paint your doormat

Have you ever made one of these? What design did you create and how did it hold up?

Thursday, November 21, 2013

Kitchen Art

kitchen art

When Mr Official Taster and I combined households, two of the hardest collections to cull and integrate were our respective stashes of artwork. We both have a good number of photos, prints, paintings, etc. to hang on the walls, and our styles are, to say the least, rather different.

We've managed hang most of our artwork since we've moved, but one place I didn't have anything on the walls was the kitchen. It seems hard to believe, I know, but it's true. The biggest hurdle was the lack of wall space. Here's a before picture to help you remember:

kitchen, before
The one real wall has a (much-appreciated) window taking up most of it. I'm (slowly) thinking of ways to spice it up, including stencils or just a bright paint color under the window. We'll see. Anyway, if you look carefully under the cabinets, you'll notice there's not wall there. The same black counter material forms the backsplash, and it reaches all the way to the bottom of the cabinets. According to the paperwork left by the previous owner, it's a quartz composite material, and even if I wanted to, there's no way I could pound in some nails to hang art. 

hooks on kitchen backsplash

Enter, 3M hooks. I had the idea that I could use one of those 3M hooks to hang a picture with. You know the ones I mean- they have some sort of sticky stuff that will hold the hook+it's weight and then you can remove the sticky strip from the wall without leaving residue or a nail hole behind. (I swear, 3M has no idea I exist). 

oops, forgot to photograph first

So I perused Target's collection and ended up with these clear guys that are supposed to be used as utensil hooks. The package of three was in the neighborhood of $3-$4. Since the package says each hook can hold up to half a pound, and I'm somewhat of a worrier, I decided to use two hooks. I simply followed the directions on the box, eyeballed the hanging height I wanted, and centered my hooks. This particular model lies pretty flat against the wall and my art now graces the backsplash above the stove. You can still see the clear parts above the frame, but they don't bother me. It's the same print that was in our last kitchen, and I'm so glad I was able to find a home for it in this one. 

kitchen art

Obviously, I wouldn't recommend hanging priceless artwork above a stove, but I think it's a great place for dollar store frames and replaceable prints. Painted frames and glass wipe off easily, so I'm not worried about any splatter. I think spaces like this where you don't want something precious are perfect for pretty pictures torn from magazines, cute cards, or photos. 

Have you been hanging art in new places? Experimenting with paint? Have any bright ideas for my one real kitchen wall?

Tuesday, October 22, 2013

Linens 'n Things

linen basket + tag

I had grand muffin plans for today, but, well, they flopped. Hopefully, I'll figure it out and have them for you later this week.

Anyway, I've got a quick update for you today in the super exciting field of (wait for it) linen organization. One of my major accomplishments this weekend was getting rid of a bunch of boxes, clearing out, and organizing our linens/laundry area. Exciting stuff I tell you.

We have an IKEA Expedit shelf that we hadn't found a spot for. In it's last incarnation, it held my cookbooks, but that doesn't work in the new place. However (and here's the really exciting part), it does fit in the closet next to the washing machine, and it slid right under the existing clothes rod. Score. We also have some extra baskets from our old tv stand, and because IKEA has it's awesome moments, they fit in many of their furniture's cubbies. Double score.

new shelf

So, to make a (not very) long story short, former bookshelf+old baskets=new laundry "room" storage. And really, the point of this post is not how putting sheets in baskets that fit into cubbies seems like it might keep dust and dog hair off them, but rather that I took the five minutes to label said baskets. My reasons were threefold:
  1. So I rember where things go
  2. So maybe Mr Official Taster will see the tags before yelling up to me "where are the sheets?"
  3. So if we have any guests looking for a clean pillowcase or towel, there are clues
linen tags

I was going to use old paint chips, but then I realized they wouldn't be pretty on both sides, so I just used some colored scrap paper, traced circles with a shot glass (I'm classy like that), cut them out, hole punched them, wrote on them, and finally used a piece of ribbon to secure each tag. 

So there you go. A five-minute, free, and painless little update that makes the closet feel more organized. What did you do this weekend?

Monday, September 30, 2013

Sapphire Sparkle

blue bedroom

Such a great paint name. Sadly, no, there are no actual sparkles in the paint.

I know these pictures are overdue, but these things happen. Our bedroom only gets natural light in the morning, which makes it a bit challenging to photograph since a) I'm usually at work before the sun rises and b) it's often cloudy in the mornings here. On the plus side, it makes the room good for afternoon naps.

Monday, August 26, 2013

New Kitchen, New Knobs

kitchen, before

A month ago, Mr Official Taster and I got keys to our very own home, and then we moved in over the following week or so. Needless to say, the past couple of months have been rather hectic and task-filled. I'm not complaining! No, if anything I am more grateful every day to come home to a place I already love. I know it's only going to get better.

so much brass

As with any new place, we have a running list of things to do, to fix, to paint, to change, to replace, etc. Some of the things on the list won't be happening anytime soon, some will happen over a weekend (painting!), and some are quick, cheap, and can really happen whenever we decide. Our first couple projects fell in the last category.
Related Posts Plugin for WordPress, Blogger...