Showing posts with label egg. Show all posts

Wednesday, September 17, 2014

Fruit Topped Citrus Olive Oil Muffins - dairy free

Blueberry Topped Citrus Olive Oil Muffins | http://www.katesshortandsweets.com

Can we take a minute and just appreciate the cuteness of mini things? They're just better.

That's right, take a moment. Enjoy the cuteness.

Now that we've got that (mostly) out of the way, let's talk about how delicious they are. Because they are. They're perfect little sweet morsels for parties, for lunch boxes, for a breakfast treat. And the other great thing about them is that they are relatively healthy. Heart healthy olive oil, fruit, and not an overwhelming amount of sugar means you can feel good ok about stuffing twelve into your mouth. Not that I've ever tried anything like that.

Fruit Topped Citrus Olive Oil Muffins, dairy free | http://www.katesshortandsweets.com

These (cute) little bite sized treats were very popular party treats last month. They're nice and light, sweet, and the fruit pieces give nice juicy bursts. Olive oil is one of those ingredients that people (ahem. Mr Official Taster) think sounds odd as part of a baked good, but, invariably, if they try it, they like it. Olive oil pairs especially well with citrus or rosemary, which makes sense given their shared growing region (like how tomatoes and basil go together).

Fruit Topped Citrus Olive Oil Muffins - dairy free | http://www.katesshortandsweets.com

You might look at the written recipe and think it's too fussy. Think again. Although these yummies are not one-bowl wonders, they're really pretty easy, hard to mess up, and worth a couple dirty bowls. Additionally, you could definitely make a batch and freeze some for later. Put them in your freezer, label them, and forget about them. That way, you will be rooting around looking for some corn for chili one day and come across your stash. It'll be on par with finding a $5 in your jeans.

But way cuter.

Strawberry Topped Citrus Olive Oil Muffins, dairy free | http://www.katesshortandsweets.com


Fruit Topped Citrus Olive Oil Muffins - dairy free
adapted from How to Cook Everything

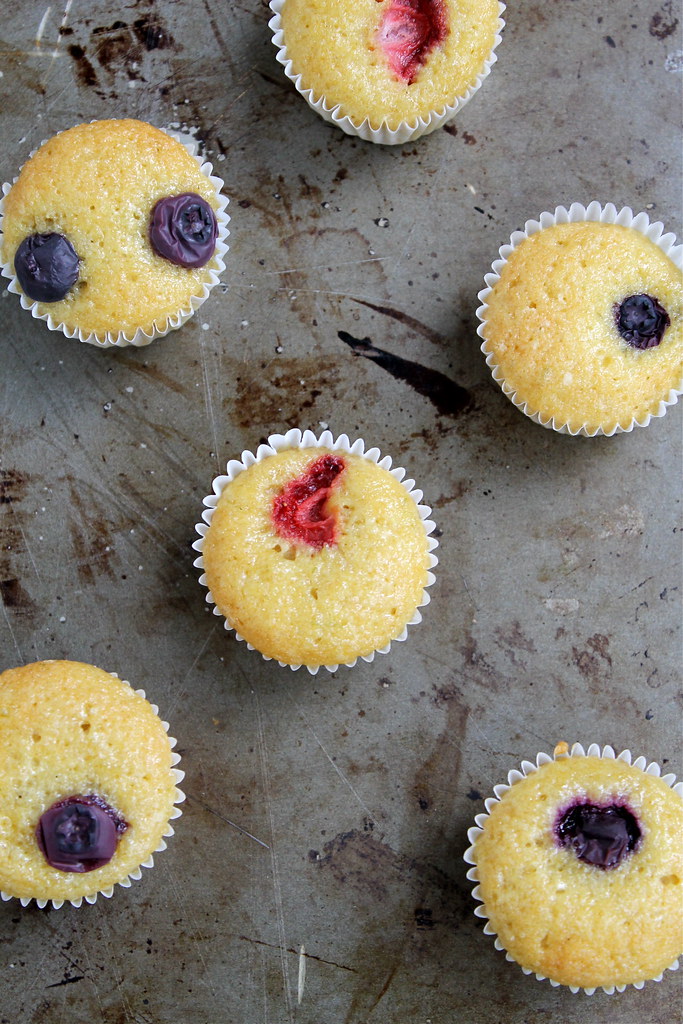
The fruit topping is completely adaptable to what you like, what allergies you may be dealing with, or even what colors you want. Red and blue are great for July 4th or Memorial Day parties. How about star fruit? Red and green (kiwis, perhaps?) for Christmas. Or pink raspberries for a little kid's birthday party. You get the idea- have fun! 

cooking spray (or liners) for pan
4 eggs, separated and room temperature
1/2 C extra virgin olive oil
1/4 + 3/4 C sugar
2 C flour
1 1/2 tsp baking powder
1/4 tsp salt
1/3 C orange juice
zest of one lemon, orange, or lime (grapefruit should be yummy too)
chopped or whole berries (or other fruit)

Separate your eggs when you first take them out of the refrigerator because it's easier when they are cold. Then allow them to come to room temperature for 30 min or so.

Preheat the oven to 350 degrees F. Spray or line muffin or mini muffin trays.

Using an electric mixer, beat the eggs whites in a small bowl until they foam. Then sprinkle in 1/4 C sugar while still beating the whites. Continue beating until the whites hold soft peaks.

In a large bowl, add the olive oil and 3/4 C sugar and beat together. Add the egg yolks and beat until thick and fluffy (5-7 minutes). Mix in the flour, baking powder, and salt. Next, mix in the orange juice and zest. The mixture will be very thick and/or crumbly. If it's crumbly, add in a splash more of juice. Don't despair.

Add the beaten egg whites to this thick mixture. As gently as possible, thoroughly fold together the batter and egg whites. You may think they will never combine, but they will.

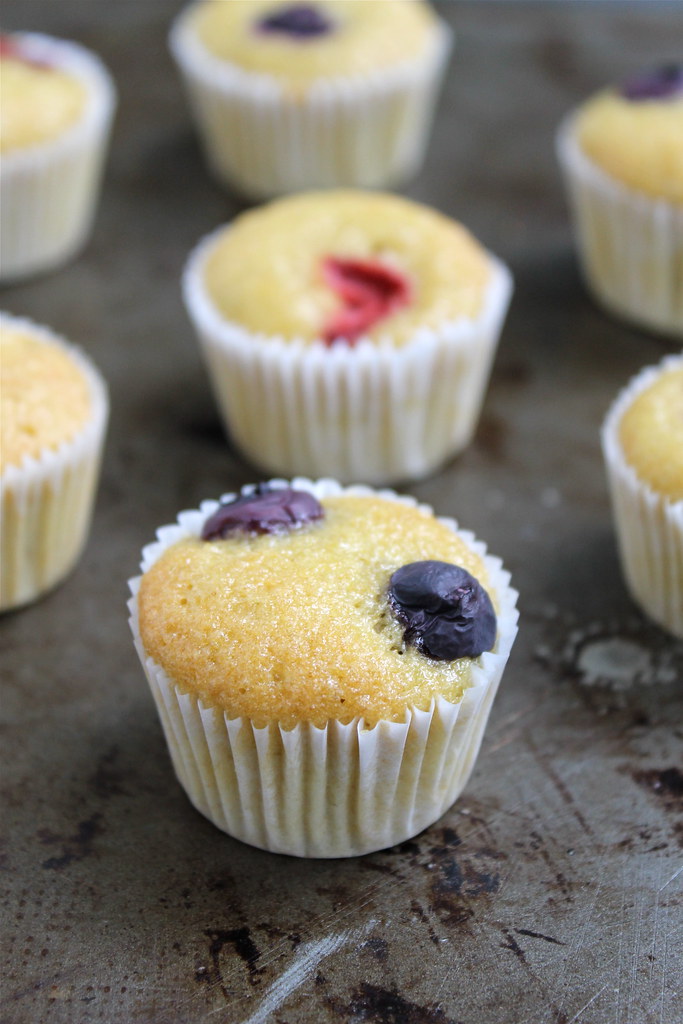
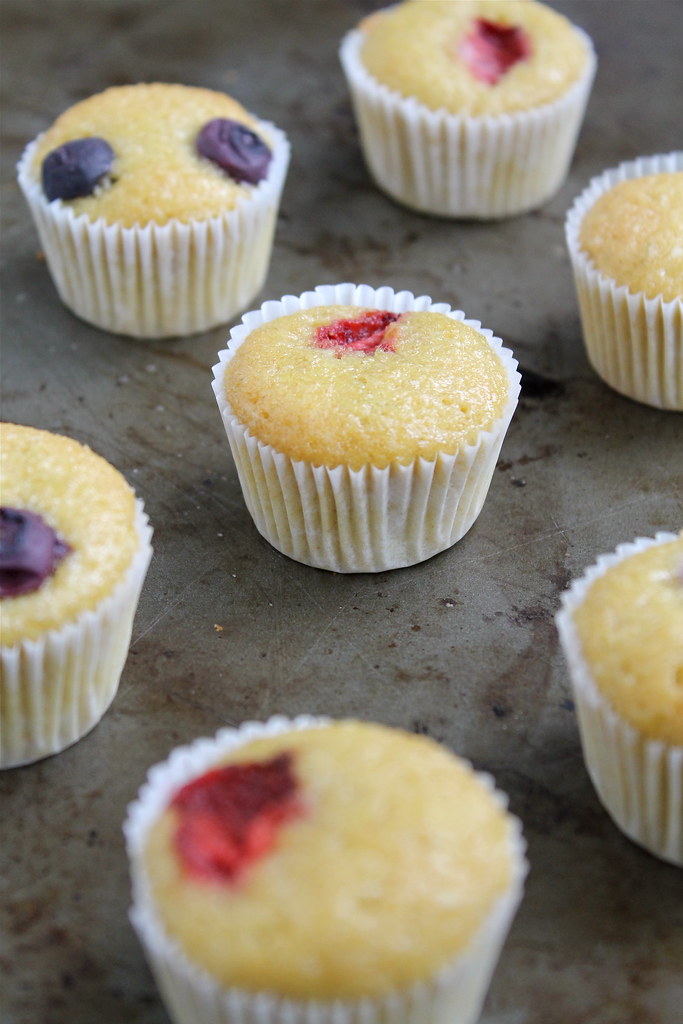
Spoon batter into cupcake pans. I used minis and topped each muffin with a couple blueberries or a slice or two of strawberry. Do what makes you happy.

Turn the mixture into your prepared pan and bake for 15-20 minutes (or until a toothpick inserted into the center comes out clean), depending on muffin size. Obviously, mini muffins will cook a few minutes faster than standard size ones. (15ish for minis, 18-20 for standards) Let the muffins cool in the pan for 10 minutes or so, then remove and allow to cool completely on a wire rack. 

Tuesday, August 12, 2014

Easiest Ever Homemade Tomato Paste

Beautiful yellow tomato, destined for paste


Well this is embarrassing. It turns out that iPhone cameras aren't great for all purposes. Apologies for the terrible photos, folks, but I am overcoming my chagrin because this recipe is worth it. Well, maybe "recipe" is too strong of a term. It's more of a set of directions and (bad) photos to go encourage you to take yourself to a farmers' market this week, ask a farmer with delicious tomatoes if they have any ugly or overripe ones, and load up. That's what I did last Thursday. I ended up getting about 10.5 lbs for $10. Luckily for me, these orange beauties happened to be Romas, which is handy since they're fleshier and less waterier that some varieties. Here is a short article listing the the best tomatoes for canning (just ignore the author's generalizations about heirlooms). As you can see, even though most of my batch was orange, the paste itself turned out surprisingly red. Not as deep of a red as in years past, but much redder than I anticipated.

The reasons to make your own are endless:
-Flavor. You simply can't compare homemade and store bought. You may not believe me now, but once you try your own, you will be a convert.
-Flavor Part 2. Adding a couple tablespoons of paste to your pastas, sauces, chilis, soups, stews, risottos, and anything else you can think of will make them have a better, richer, deeper flavor. In fact, tomato paste is a great source of the much sought after umami magic.
-Economics. Those cans of paste are relatively inexpensive at the store, right? They're generally in the $1-$2 range. I don't know about you, but whenever I bought one of those, I never used the whole can up at once, and I usually forgot about the leftovers until they were growing fuzzy mold in the back of the fridge. So really, I used maybe thirty cents worth of the can and had to toss the rest. That suddenly makes every tablespoon of paste cost $1.50. The great thing about this technique is that I freeze my homemade tomato paste in 1-2 tablespoon size portions, so I can just grab what I need and stick the rest back in the freezer. Et voila. No more waste.
-Just like all the other food you make at home, you know exactly what's in your paste (and what isn't). What's more, by talking to the farmer, you'll actually be meeting the person who grew part of you dinner. Sweet. Do you have a bumper crop of your own tomatoes this year? a) I'm jealous and b) even better!

So. Tomato paste.

Until a couple of years ago, I thought that making tomato paste would be a pain in the neck. It turns out that is not true. The article that originally set me straight is no longer available, but the moral of the story is that homemade tomato paste is one of the easiest things you can make. Yes, it takes time (many hours), but that's really all it takes. If you can boil water and remember to stir occasionally, you're all set.

So. You have your tomatoes. It doesn't matter how many you start with, the process is the same. The only variables here are the juiciness of your tomatoes and time. Find yourself a large, wide pot, a sturdy spoon, and an afternoon. Let's make tomato paste!

photo 2

Begin by washing them (yes, even if they're organic. My mom says so). Remove any stems and bad bits. Bruised, over ripe, mushy spots are fine, but cut off the mold. You don't need to peel or seed them. Cut them into halves (or smaller if they are large).

10 lbs of tomatoes in a big pot

Put the prepared tomatoes into a large pot. Wider is better, because the greater the surface area, the faster the evaporation. You'll need a sturdy spoon, too. 

starting to cook

Heat them over medium, stirring occasionally. If you're super worried about sticking, you can add a smidge of water to help prevent that, but I've found the tomatoes own juices and a stir now and then are enough. 

boiling

Bring them to a boil, still stirring once in a while to ensure there's no sticking. You can boil them pretty hard for a while, because that's going to be the fastest way to evaporate all that water. 

reducing

It may not seem like it at first, but your tomatoes will begin to cook down. Promise. Stir occasionally, and lower the heat as the level of water in the pot goes down. Scrape the sides down once in a while to make sure you're not missing any tomatoey goodness.

nearly there

(please ignore the jam-stained spoon) 
Eventually, it will begin to look like tomato paste. It will darken and become quite thick. But don't give in or give up! You're not quite there. Stir more frequently to prevent scorching. If you have one, and feel so inclined, this might be a good time to use your immersion blender. I don't mind the not-perfectly-smooth texture, but you might. 

easy homemade tomato paste

You want to keep cooking it down until there's not really enough water left to evaporate. Between the last photo and this one, mine stopped bubbling because there wasn't enough water left to boil. When it's done, or nearly there, your tomato paste will also become shiny. Weird, but true. 

easiest ever homemade tomato paste

My easy freezer method involves filling the compartments of a couple ice cube trays with 1-2 tablespoons of paste. I couldn't remember if I greased the trays in years past or not, but this year I did to ensure my tomato cubes would pop out easily. I bet if you use a silicon mold you can skip the cooking spray. This 10 pound batch of tomatoes yielded 24 cubes of 1-2 tablespoons each. 


Once they are fully frozen, remove cubes from tray, place in zip top freezer bag, squeeze the air out, and stash in your freezer. Homemade tomato paste is a great addition to paella, casseroles, stew,  chili, sauce, or risotto, whether or not the recipe actually calls for it. 

Have you ever made your own tomato paste? Any tips? Did you fall as hard in love with it as I did?

Wednesday, November 13, 2013

Red Wine Chocolate Cake with Coconut Whipped Cream - dairy free/vegan/gluten free

Red Wine Chocolate Cake (dairy free) with Coconut Whipped Cream (vegan & gluten free)

I made my mom bread, but I made my dad cake.

I knew I wanted to make my dad a birthday cake while he was here, but I didn't want it to be a tower of sugar and frosting (I know, I know. That would have been awesome). I've had a few recipes saved for chocolate cakes that use wine to add flavor and color, so I looked through what I had, picked the best of the lot, adapted it a bit, and made it. But you pretty much need frosting on a birthday cake or it's not a birthday cake. I wanted something light and not chocolate, so I went with a vanilla whipped cream made from coconut milk. I had good luck in the past with chocolate frosting using coconut milk, so I was eager to try it's vanilla cousin.

Red Wine Chocolate Cake (dairy free)

Thursday, October 17, 2013

Spinach and Tomato Quiche - vegetarian & dairy free, or not

Spinach, Feta, and Tomato Quiche - vegetarian

There are days when you want to do something fancy and there are days when you get take out and there are days when you just want to get a dinner on the table that didn't come from a box. This is one of the latter. It's like my risotto, baked barley, red pepper sauce, and pot pie in that the recipe invites you to make it yours.

Tuesday, September 24, 2013

Breakfast Salad - gluten free, dairy free, vegetarian

Breakfast Salad

Hi all- I'm back again. For those of you who don't follow along on Instagram or Facebook, Mr Official Taster and I went on a pretty epic trip. One Phillies game. Two weddings. Three flights. Nine States. Ten days. Seven beds to rest our weary heads. 

Let me be clear: it was fun and I'm so glad we went. The weddings were lovely, the flights uneventful. We visited with so many people, some of whom we hadn't seen in years and years and years. But, boy, were we glad to get home to stinky puppies, piles of mail, laundry for days, and our own kitchen where we could make instead of buy food and snack when we felt like it. 

Related Posts Plugin for WordPress, Blogger...