Showing posts with label summer. Show all posts

Saturday, September 13, 2014

Blackberry Coconut Oatmeal Cookies - vegan

Blackberry Coconut Oatmeal Cookies | http://www.katesshortandsweets.com

In my mind, it's still summer. Yes, there have been a few chilly, fall-like moments. And yes, you can buy pumpkins and pumpkin flavored things at stores and coffee shops. But at the grocery store this afternoon, right across from the pumpkin display was an equally large watermelon display. Welcome to September. It's got to be the most bountiful month of the harvest. So here, on this tiny piece of the interwebs, we're going with summer. I'm going to join Deb and declare this a pumpkin-spice-free-anything zone for at least another couple of weeks. 

vegan Blackberry Coconut Oatmeal Cookies | http://www.katesshortandsweets.com

So, since it's summer, and since berries are still abundantly available at my farmers' markets, these cookies are a perfect way to savor the season. I love fresh berries in cookies, and these were a big hit at our big party a few weeks ago. They are tiny, perfectly sized, relatively wholesome treats. No, really. There are whole grains and fruit. See? Relatively wholesome.

Blackberry Coconut Oatmeal Cookies - vegan | http://www.katesshortandsweets.com

Were I even more on top of things, I would make up a batch or two, divide dough and form into logs. Next, I'd wrap each log in plastic wrap and stick them in the freezer. (oh, and, uh, labeling them is helpful. I recommend a sharpie and some tape) Then, come the dark days of February, I could take out a log, slice off some cookies, and bake up some summer. 

You know, to compliment my Pumpkin Spice tea.

Blackberry Coconut Oatmeal Cookies, vegan | http://www.katesshortandsweets.com


Blackberry Coconut Oatmeal Cookies - vegan
Of course, you can also make these not vegan by using regular butter and milk, and 1 egg instead of the applesauce. Yields about 50 teaspoon sized cookies.

1/2 C coconut oil
1/2 C firmly packed brown sugar or Sucanat
1/2 C sugar
1/4 C applesauce
1 tsp vanilla
3 Tbsp non-dairy milk (I used almond)
1 C flour
1/2 tsp baking soda
1/2 tsp baking powder
1 C quick or rolled oats, uncooked
3/4 C fresh blackberries, chopped if large

Preheat the oven to 350 degrees F and grease or line a couple cookie trays.

Cream the coconut oil and sugars. Add in the applesauce, vanilla, and milk and beat until smooth. Do the same with the flour, baking soda, and baking powder. Finally, beat in the oats. Fold or stir in blackberries, smooshing as much or as little as you'd like.

Drop teaspoons of dough (YES. teaspoons. Larger amounts of dough don't work very well) 2 inches apart on prepared pan. Bake about 15 minutes. Remove from oven, and allow to cool for 5-10 minutes before transferring to wire rack to cool completely.

Tuesday, August 12, 2014

Easiest Ever Homemade Tomato Paste

Beautiful yellow tomato, destined for paste


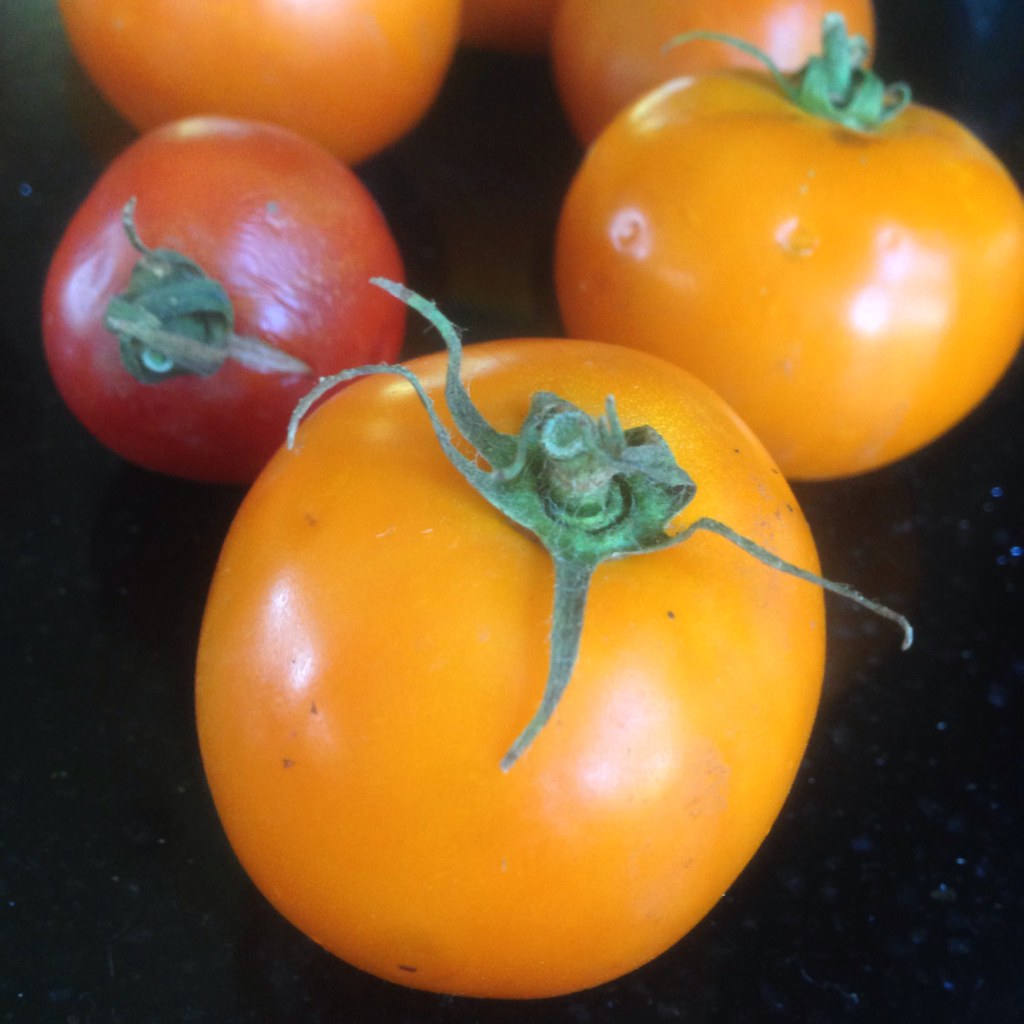
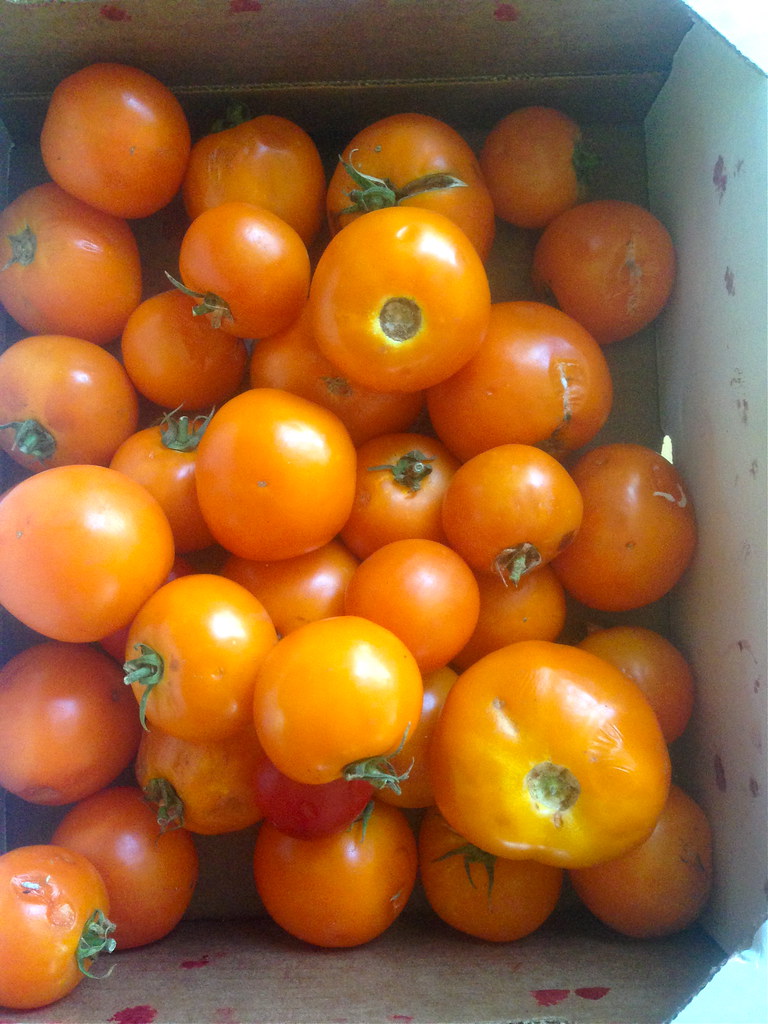
Well this is embarrassing. It turns out that iPhone cameras aren't great for all purposes. Apologies for the terrible photos, folks, but I am overcoming my chagrin because this recipe is worth it. Well, maybe "recipe" is too strong of a term. It's more of a set of directions and (bad) photos to go encourage you to take yourself to a farmers' market this week, ask a farmer with delicious tomatoes if they have any ugly or overripe ones, and load up. That's what I did last Thursday. I ended up getting about 10.5 lbs for $10. Luckily for me, these orange beauties happened to be Romas, which is handy since they're fleshier and less waterier that some varieties. Here is a short article listing the the best tomatoes for canning (just ignore the author's generalizations about heirlooms). As you can see, even though most of my batch was orange, the paste itself turned out surprisingly red. Not as deep of a red as in years past, but much redder than I anticipated.

The reasons to make your own are endless:
-Flavor. You simply can't compare homemade and store bought. You may not believe me now, but once you try your own, you will be a convert.
-Flavor Part 2. Adding a couple tablespoons of paste to your pastas, sauces, chilis, soups, stews, risottos, and anything else you can think of will make them have a better, richer, deeper flavor. In fact, tomato paste is a great source of the much sought after umami magic.
-Economics. Those cans of paste are relatively inexpensive at the store, right? They're generally in the $1-$2 range. I don't know about you, but whenever I bought one of those, I never used the whole can up at once, and I usually forgot about the leftovers until they were growing fuzzy mold in the back of the fridge. So really, I used maybe thirty cents worth of the can and had to toss the rest. That suddenly makes every tablespoon of paste cost $1.50. The great thing about this technique is that I freeze my homemade tomato paste in 1-2 tablespoon size portions, so I can just grab what I need and stick the rest back in the freezer. Et voila. No more waste.
-Just like all the other food you make at home, you know exactly what's in your paste (and what isn't). What's more, by talking to the farmer, you'll actually be meeting the person who grew part of you dinner. Sweet. Do you have a bumper crop of your own tomatoes this year? a) I'm jealous and b) even better!

So. Tomato paste.

Until a couple of years ago, I thought that making tomato paste would be a pain in the neck. It turns out that is not true. The article that originally set me straight is no longer available, but the moral of the story is that homemade tomato paste is one of the easiest things you can make. Yes, it takes time (many hours), but that's really all it takes. If you can boil water and remember to stir occasionally, you're all set.

So. You have your tomatoes. It doesn't matter how many you start with, the process is the same. The only variables here are the juiciness of your tomatoes and time. Find yourself a large, wide pot, a sturdy spoon, and an afternoon. Let's make tomato paste!

photo 2

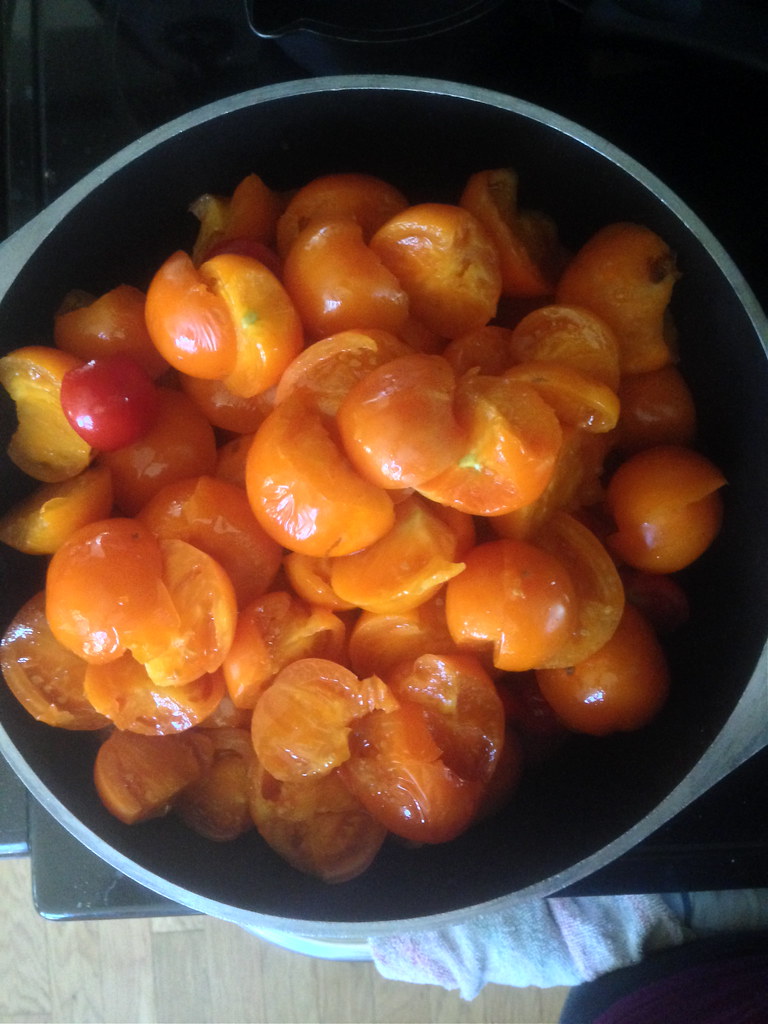
Begin by washing them (yes, even if they're organic. My mom says so). Remove any stems and bad bits. Bruised, over ripe, mushy spots are fine, but cut off the mold. You don't need to peel or seed them. Cut them into halves (or smaller if they are large).

10 lbs of tomatoes in a big pot

Put the prepared tomatoes into a large pot. Wider is better, because the greater the surface area, the faster the evaporation. You'll need a sturdy spoon, too. 

starting to cook

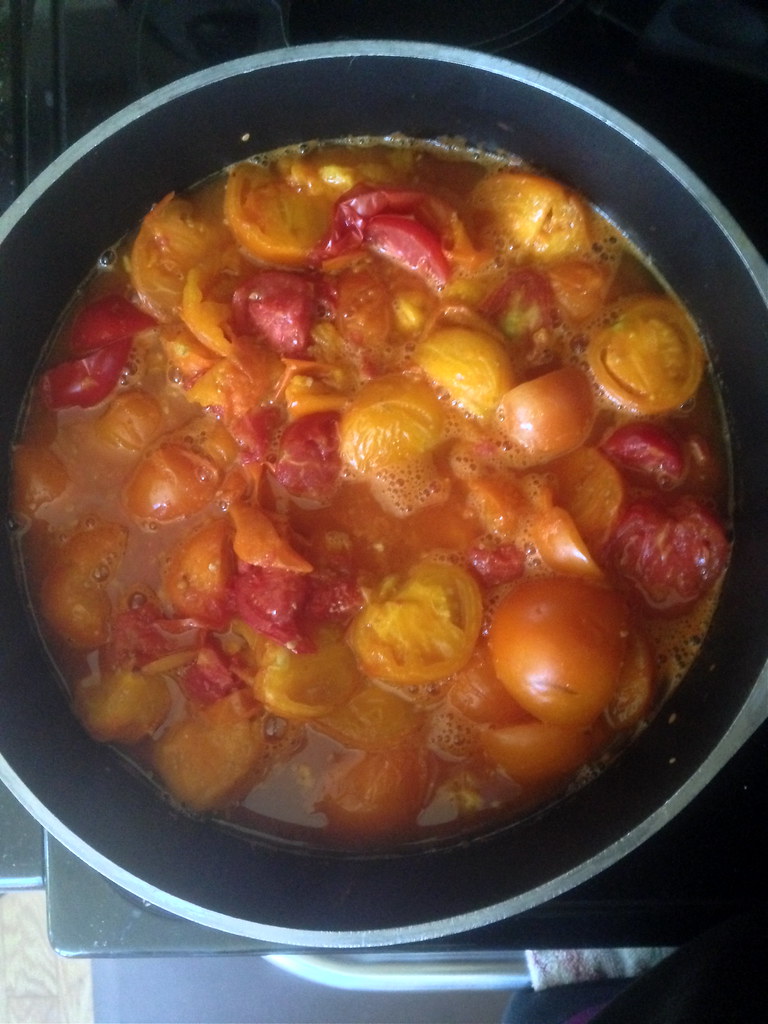
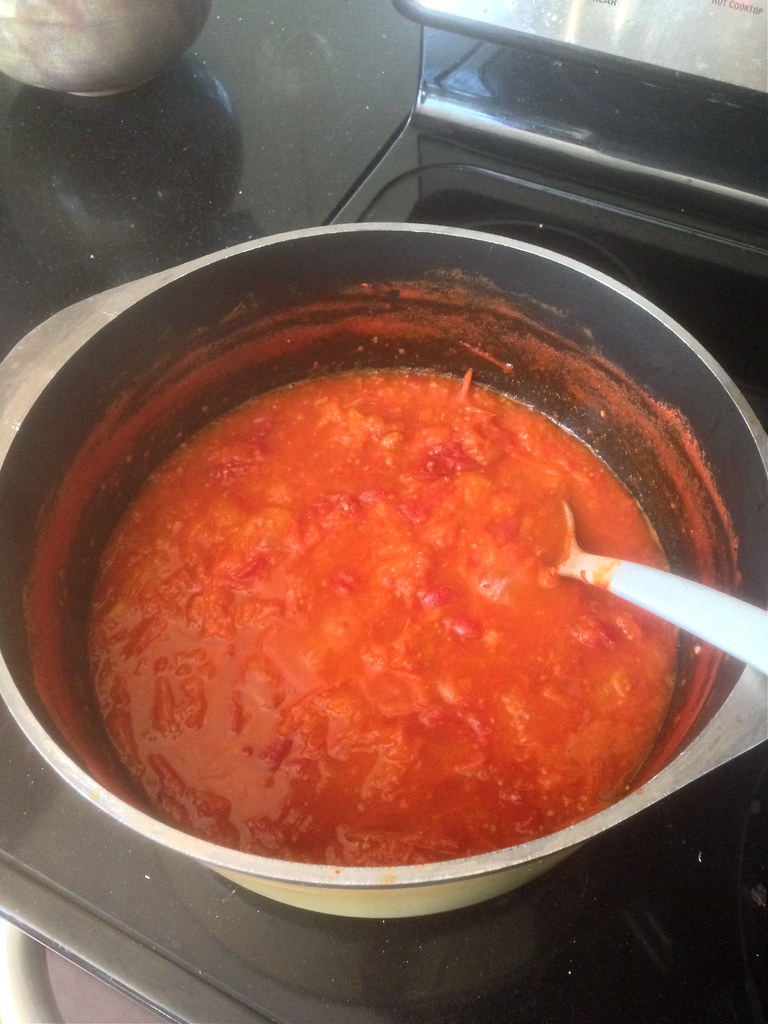
Heat them over medium, stirring occasionally. If you're super worried about sticking, you can add a smidge of water to help prevent that, but I've found the tomatoes own juices and a stir now and then are enough. 

boiling

Bring them to a boil, still stirring once in a while to ensure there's no sticking. You can boil them pretty hard for a while, because that's going to be the fastest way to evaporate all that water. 

reducing

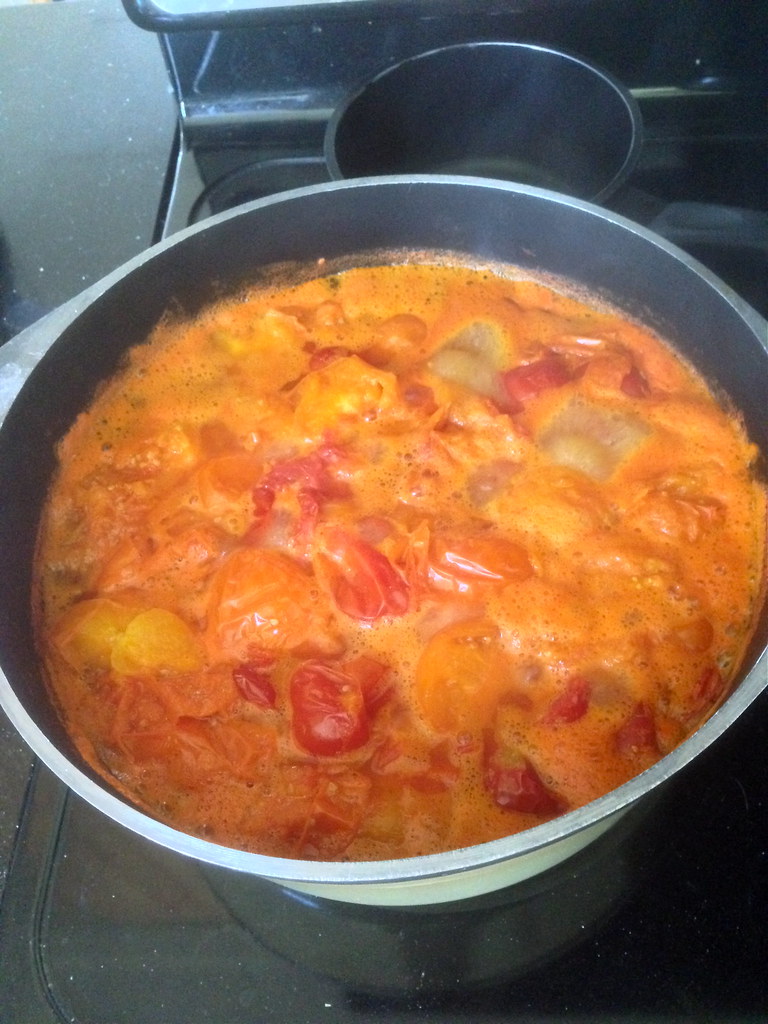
It may not seem like it at first, but your tomatoes will begin to cook down. Promise. Stir occasionally, and lower the heat as the level of water in the pot goes down. Scrape the sides down once in a while to make sure you're not missing any tomatoey goodness.

nearly there

(please ignore the jam-stained spoon) 
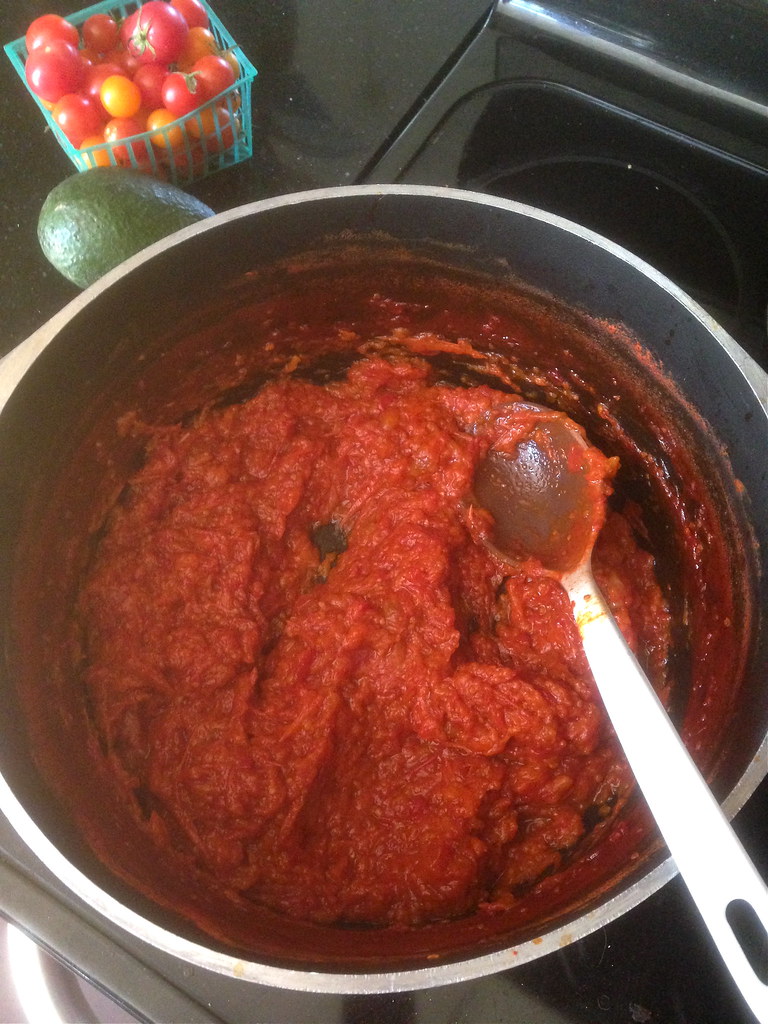
Eventually, it will begin to look like tomato paste. It will darken and become quite thick. But don't give in or give up! You're not quite there. Stir more frequently to prevent scorching. If you have one, and feel so inclined, this might be a good time to use your immersion blender. I don't mind the not-perfectly-smooth texture, but you might. 

easy homemade tomato paste

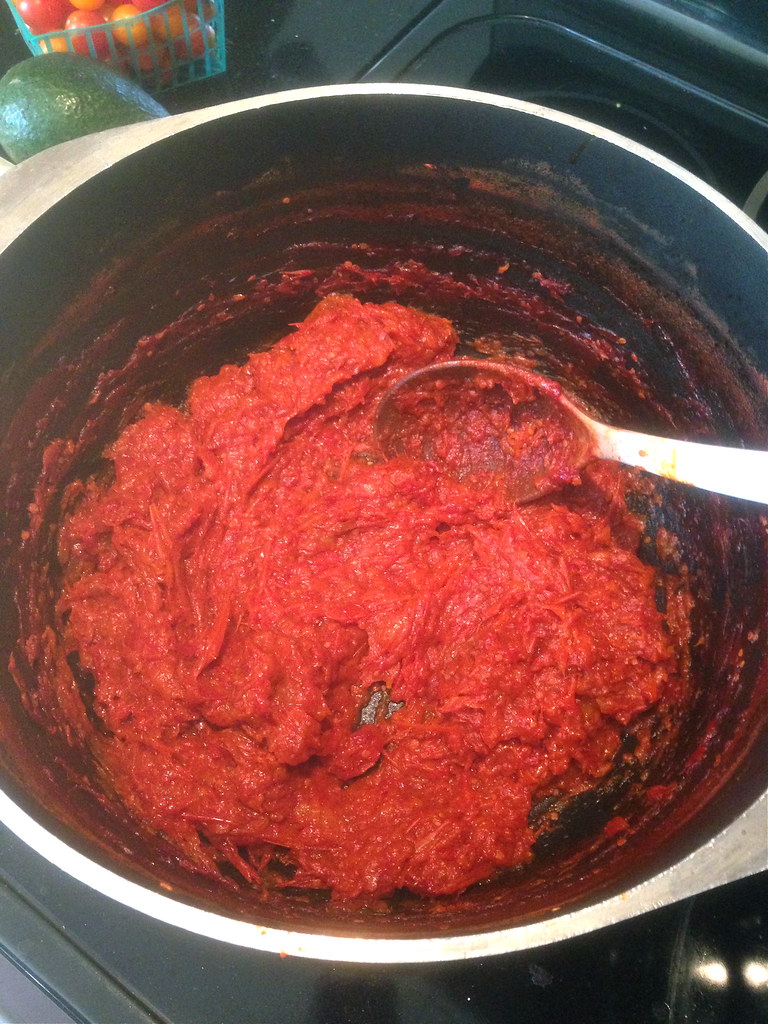
You want to keep cooking it down until there's not really enough water left to evaporate. Between the last photo and this one, mine stopped bubbling because there wasn't enough water left to boil. When it's done, or nearly there, your tomato paste will also become shiny. Weird, but true. 

easiest ever homemade tomato paste

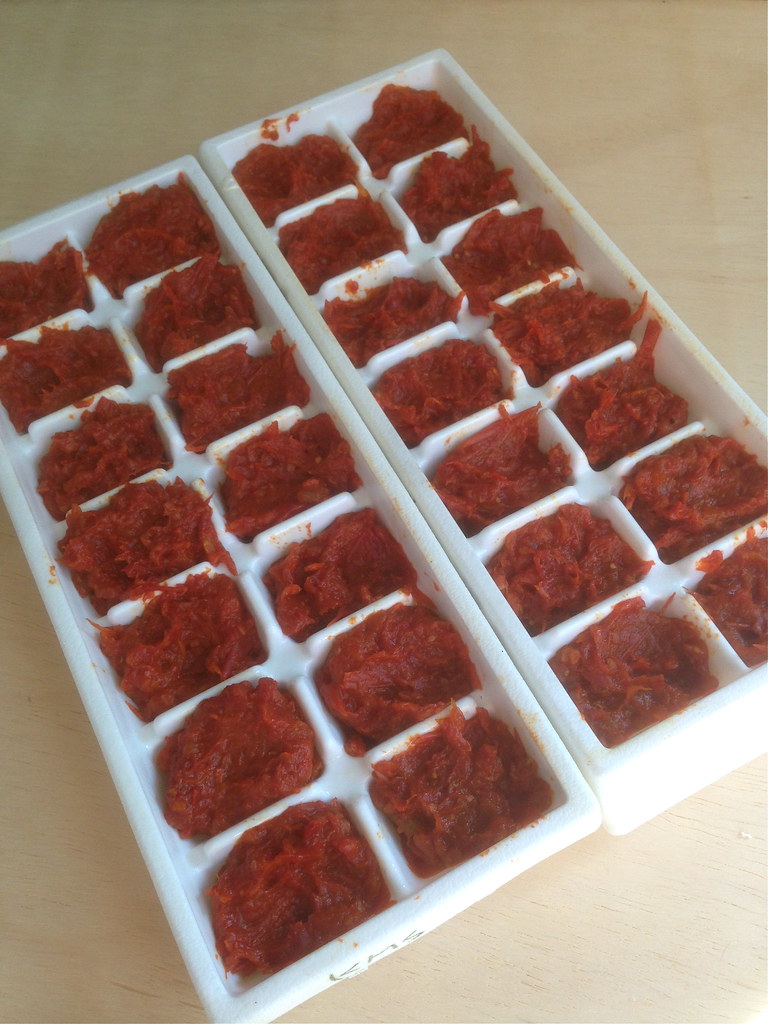
My easy freezer method involves filling the compartments of a couple ice cube trays with 1-2 tablespoons of paste. I couldn't remember if I greased the trays in years past or not, but this year I did to ensure my tomato cubes would pop out easily. I bet if you use a silicon mold you can skip the cooking spray. This 10 pound batch of tomatoes yielded 24 cubes of 1-2 tablespoons each. 


Once they are fully frozen, remove cubes from tray, place in zip top freezer bag, squeeze the air out, and stash in your freezer. Homemade tomato paste is a great addition to paella, casseroles, stew,  chili, sauce, or risotto, whether or not the recipe actually calls for it. 

Have you ever made your own tomato paste? Any tips? Did you fall as hard in love with it as I did?

Wednesday, July 23, 2014

Jams, and Printable Recipe Cards for Summer

blackberries

We are in the thick of summer and the food bounty that goes along with that. We have been eating tons and tons of fruit, and I've also dried some and turned more into various jams. I can't keep up here with what I've been making, but I wanted to share with you a) so that I remember and b) so that perhaps you'll be inspired and go create something fabulous.

Raspberry Honey & Lemon Jam at attention

I shared my small batch strawberry jam and my strawberry margarita jam, but, for the record, I've also preserved
  • Apricot Jam
  • Apricot Sucanat Jam (no white sugar at all)
  • Strawberry Sucanat Jam (ditto)
  • Blackberry Jam (with even less sugar than last year's batch)
  • Blackberry Vanilla Jam (OMG it's AMAZEBALLS)
I find this post from Northwest Edible Life to be extremely helpful, and I keep thinking up new and delicious sounding flavors. I definitely want to do more with vanilla, and I've started a canister of vanilla sugar with the (now empty) pods.

What have you been up to?

Now, onto the printable. These lovely, summery recipe cards from Lia Griffith are perfect for sharing recipes at summer parties or with a batch of jam.


Whether you share the jam recipe, or suggest a way to use the jam (brownies, ice cream, bars, etc), these cards will make your ideas even prettier. 

Tuesday, July 8, 2014

Strawberry Ice Cream - vegan & gluten free

perfect for summer Strawberry Ice Cream - vegan, gluten free | http://www.katesshortandsweets.com

I think I've teased you long enough. 

I'm finally sharing my recipe for vegan Strawberry Ice Cream. Even though I was allergic to strawberries and dairy for most of my childhood, it's one of those dishes that just screams "summer!" to me, along with peach crisptomato salad, and grill pizza. It's not so early in the growing season that strawberries are so precious that each one is savored raw, and "how-dare-you-even-suggest-that-I-could-get-sick-of-these!" is a common thought when reading recipes that cook down pints of them. It's full on Summer, which means beautiful, full-flavored strawberries are everywhere, and it becomes hard to keep up with Mother Nature.

vegan Strawberry Ice Cream from above | http://www.katesshortandsweets.com

Mr Official Taster was certainly happy for me to give this a whirl, and he likes it better than my vegan sangria fruit ice cream. (I like that one better from a economic/fully use your food point of view, but this recipe is more practical for the everyday). In many ways, my vegan jam ice cream is my favorite frozen creation, but I can understand not wanting to give up/sacrifice/repurpose yummy jam.

vegan, gf Strawberry Ice Cream | http://www.katesshortandsweets.com

ANYWAY, this jam is fairly simple to put together. The hardest part is remembering to plan for 4-5 hours of chilling time for the base and to already have your ice cream maker bowl frozen. I try to keep my in the freezer in case the ice-cream-making mood strikes, but sometimes actual food takes precedence in the space wars.

strawberries and ice cream | http://www.katesshortandsweets.com

So go ahead, celebrate summer with this yummy vegan (and gluten free, of course) strawberry ice cream. What dishes scream summer to you? Let's discuss in the comments!

Strawberry Ice Cream celebrates summer!  vegan | http://www.katesshortandsweets.com


Strawberry Ice Cream - vegan & gluten free
adapted from The Kitchn

I have successfully halved this recipe, so if you don't want the temptation of an entire batch, know that it works. Want to add some yummy bits to the ice cream? Add things like chocolate chips or graham crackers in the last five minutes of processing. If you don't need to worry about dairy, white chocolate chips seem like they would be delicious. When I made this recipe, I didn't use the cornstarch the original added, and I also didn't add any liquid sweetener. I liked it just fine. It wasn't super sweet, so if you'd like more sweetness, please add it in.

2 (15-ounce) cans full-fat coconut milk
1/2 cup agave nectar (or honey, although I found I did not need the extra sweetness of either option)
1/4 teaspoon kosher salt
1 vanilla bean, split (or 1 tsp vanilla extract)
1 dry pint (2 cups) strawberries, hulled and quartered
1/4 cup natural cane sugar (I think an equal or smaller amount of honey would work instead, though I haven't tried it)

Make sure your ice cream maker's bowl is thoroughly chilled per the manufacturer's instructions.

Shake the cans of coconut milk thoroughly to combine before opening. Combine the coconut milk, agave (if using) and salt in a saucepan. Bring to a simmer over medium-low heat until all of the ingredients combine smoothly and the mixture is uniformly warmed, about 2 minutes.

Scrape the vanilla bean into the mixture and slip in the pod as well (or add vanilla extract). Cook over medium heat until the mixture has thickened enough to coat the back of a spoon, 6 to 8 minutes. Do not to allow the mixture to boil.

Remove the pot from the heat, discard the vanilla bean pod, and pour the coconut base into a bowl. Cool on the counter for 30 minutes, then cover and chill in the refrigerator for 4 to 5 hours — you really do need the base to be very cold before you process it in the ice cream machine.

While the base is cooling, make the strawberry sauce. Mash the strawberries down in a small to medium saucepan. Sprinkle in the sugar and bring to a low boil. Reduce the heat to simmer and cook for about 5 minutes, or until the berries start to lose their shape and become juicy. Remove from the heat and cool on the counter for a bit. Once slightly cool, blend in a food processor or blender, or with an immersion blender, for just a few seconds until a thick sauce forms (it will be somewhat jammy in consistency). Set aside (or stick in the fridge until you're ready to go).

Churn the coconut ice cream base and strawberry sauce in your ice cream machine following the manufacturer’s instructions. I've never found coconut ice cream to get really hard in a machine - it's always a bit like soft serve in consistency. Enjoy immediately or spread the ice cream into a large loaf pan (or pie pan) and freeze for a few more hours (or overnight) until the ice cream has firmed up completely. Mine froze super hard, so you may need to take it out 10 minutes or so before you'd like to serve it. 

Friday, June 20, 2014

Strawberry Rhubarb Double Crisp - vegan & gluten free

Strawberry Rhubarb Double Crisp - vegan and gluten free

Happy (almost) Summer! Tomorrow, June 21, marks the official start of summer. Around here it's still cool enough to drink hot tea in the morning, but the afternoons have been glorious. I've been busy with strawberries lately, and I think my berry obsession will go on for the next several months (you're welcome). Last year my strawberry forays were pretty tame, but this year I'm hoping to share more creative ideas. I'll be the first to admit that a crisp isn't a terribly good example of said creativity, but crisps top the list of my favorite summer desserts, so I think I'll give myself a pass.

Strawberry Rhubarb Double Crisp

(One of) the great things about crisps is their endless adaptability. Want to use different fruit? Go ahead, it's no problem! Want something warm for dessert? These are perfect! Want a cold breakfast? Crisps to the rescue! I really can't say enough good things about them.

Strawberry Rhubarb Double Crisp - vegan, gluten free

Up until this point, I've always made crisps comprised of a layer of fruit and a layer of topping/crumbley crisp/crust/whathaveyou. This was my first double crisp experiment, and I was pleasantly surprised. Two crusts make them more bar-like, and thus more structured, which, besides photographing better, leads to easier serving to guests. It also makes the crisp a bit heartier, and (I think) even better for breakfast.

vegan, gf Strawberry Rhubarb Double Crisp


Strawberry Rhubarb Double Crisp - vegan & gluten free
adapted from Smitten Kitchen

I doubled the amount of fruit Deb used in her version, so if you have less, know that will work. I tested this recipe with olive oil and melted coconut oil AND with white whole wheat flour, almond flour, and brown rice flour. I preferred the coconut oil (crispier than olive oil) and the almond flour (yum). I see no reason that whole wheat flour or your favorite gluten free flour will not work in place of the listed all-purpose. To make this corn free, be sure to omit the cornstarch (duh), but also don't sprinkle any confectioners' sugar on top. 

Yield: 16 small bars or 9 larger ones (pictured); recipe can be doubled and baked in a 9×13-inch baking pan, where they will come out a little thicker

1 C (80 grams) rolled oats
3/4 C (95 grams) plus up to 2 Tbsp (15 grams) extra all-purpose or gluten free flour (see note)
1/2 C (95 grams) Sucanat or brown sugar
Heaped 1/4 tsp table salt
5 Tbsp vegetable oil or coconut oil, melted (see note)
1 tsp cornstarch (optional, but helps firm up the filling)
1 Tbsp (15 ml) lemon juice
1 Tbsp (15 grams) granulated sugar
2 C (250 grams) small-diced rhubarb (from about 3 medium stalks)
2 C (310 grams) small-diced strawberries
Powdered sugar, for decoration, if desired

Preheat oven to 375F. For easy removal, line bottom and two sides of 8-by-8-inch square baking pan with parchment paper. No need to bother (and no greasing needed) if you plan to serve them right in the pan, as I did.

Place oats, flour, Sucanat, and salt in a large bowl and mix. Pour oil over the mix and stir until clumps form. If the clumps feel soft or look overly damp, add the remaining 2 tablespoons flour. Pour in and press a generous half of the crumb mixture evenly in the bottom of the pan.

Toss fruit with lemon juice, sugar, and cornstarch if using; then spread evenly over the crust. Scatter reserved crumbs over fruit and bake bars for 30 to 40 minutes (firmer fruits will take longer), until fruit is bubbly and crisp portion is golden and smells toasty and amazing.

Let cool in pan and cut into squares. Sprinkle with powdered sugar, if desired. Store leftovers covered in fridge.

Friday, May 30, 2014

Small Batch Strawberry Jam - vegan, gluten free, and free of just about everything else

Strawberry Honey Jam - vegan, gf www.katesshortandsweets.com

As longtime readers will know, I have a bit of an obsession/problem/interest in regards to farmers' markets. Last week, as usual, I bought a lot of fruit. Possibly more than two people (even with guests) can eat before it passes its prime. And so it came to pass that we had a couple pints of strawberries left that were just a bit too ripe to happily eat. I didn't want to throw them away (shudder), so I decided to make a mini batch of strawberry jam. Mr Official Taster has been on a bit of a pb&j roll lately, and we've just about used up the jams I made last summer, so this seemed like a good solution.

End of market bounty

I started out with the intention of just using up the fruit I had and making a jar or two of jam. I wanted to keep it as simple as possible, so I didn't want to sterilize and get set up for water bath canning. That's the beauty of small batch jams. Use what you have, pour into normal clean containers, refrigerate, and eat. Super simple, and it's a great way to use up aging fruit. Of course, you don't want to use fruit that really is past its prime and belongs only in the compost bin (duh. but it has to be said).

Strawberries for jam

To figure out my ingredient volumes, first I rinsed, hulled, and roughly chopped up the berries. I ended up with about three cups, so I wanted to use a bit less than half that volume of sugar. The lemon is in there to brighten the sweetness, rather than to provide acid for canning. This ratio can translate to lots of other summer fruit, so use this as a template and keep yourself in super seasonal, fresh jam all summer (or if you need to finish up some fruit before heading on a trip). You could also use this process to make small batches of freezer jam.

Small Batch Strawberry Honey Jam www.katesshortandsweets.com


Small Batch Strawberry Jam - vegan, gluten free, and free of just about everything else

Important: this is not a tested and safe recipe for canning. I made this small batch with the intention of refrigerating and consuming within a couple of weeks. You could also freeze it. 

Next time I'll probably reduce the sweetness a bit more, but as written, this is quick, easy, and bursting with strawberry goodness. You can skip the honey all together and just use sugar. 

3 C chopped strawberries, picked over and rinsed
scant 1 C sugar
1/4 C honey (for strict vegans use sugar instead)
splash of lemon juice

Add all ingredients to a medium pot or large sauce pan. At this point, I like to stir them a bit and then leave it alone and let the sugar start drawing the juices out of the berries for a bit (10 minutes to several hours) while I do other things. If you are in a rush, skip that part and just keep going.

Over medium heat, bring the mixture up to a boil. Stir frequently and help the jam along by squishing some fruit with your kitchen utensil of choice. Keep a close eye on things, as small batches cook quickly. Mine took about 10-15 minutes. Test for set (or aim for a temperature of 220F). I didn't actually test either the temperature or for set. I just kind of eyeballed it, and it worked out ok. Pour into clean jars, allow to cool, cover and refrigerate. It should last a few weeks in the fridge.

Thursday, May 22, 2014

Memorial Day Weekend Recipe Round Up

Here are some of my favorite summer/picnic/party recipes to help you plan your weekend. Bon appetit!


Sangria Fruit Ice Cream
I know I just posted about it, but I'm repeating myself for a reason. Sangria Fruit Ice Cream is delicious!

Coconut Whipped Cream (vegan & gluten free)
Coconut Whipped Cream - because a party just isn't a party without whipped cream

Fresh Pea Hummus, vegan & gluten free
Fresh Pea Hummus - great with chips or on a sandwich

soy sauce marinade for tofu, veggies, or meat
Soy Sauce Marinade for tofu, veggies, or meat

Tzatziki Potato Salad
Tzatziki Potato Salad - just mind the temperature! Don't leave it out more than 4 hours

nice and tangy lemonade
Sweet Tart Lemonade - perfection


Chocolate Cupcakes with Chocolate Buttercream Frosting
Chocolate Cupcakes with Chocolate Frosting - a classic

How are you celebrating this weekend?

Tuesday, May 20, 2014

Sangria Fruit Ice Cream - vegan & gluten free

Sangria Fruit Ice Cream | www.katesshortandsweets.com

Can you believe it's already almost Memorial Day weekend? Can we talk about that for a second? Because I really can't seem to wrap my mind around it. At work, we're planning and prepping for a busy weekend, as we are at home, but I really just can't take it in that it's already the beginning of summer. Maybe if we had fireflies here it would be easier to grasp? (yes, sad fact. no fireflies on the west coast)  I just...whew this year is flying.

Sangria Fruit Ice Cream - vegan & gluten free | katesshortandsweets.com
from above, Sangria Fruit Ice Cream - vegan & gluten free

"Anyway, moving on" as my dad would say. Are you hosting or attending a party this weekend? I don't know what else you have planned, but I recommend sangria and ice cream. Both are perfect harbingers of summer, and both are crowd pleasers. They are also show stoppers that are easy to prepare and easy to prepare for a group.

Blueberries

First, let's talk sangria. Here are some mouth-watering recipes I pulled from my Pinterest collection of drinks:


If you make one or four of them, invite me! I'll bring brownies and my ice cream maker.

vegan & gluten free Sangria Fruit Ice Cream

Alas, I can't invite you over to my place because, well, it's gonna be full. I have good friends coming for a visit (yay!), and a sister-in-law graduating with an MBA (yay!), which means parents-in-law will also be in town (yay!), and, well, I think you can agree that the weekend sounds pretty full. If I were more on top of things and didn't have to, um, work, perhaps I'd be the one cooking a celebration feast. If I were, sangrias sound like a festive must-drink.

blueberries and ice cream

The beauty of this "recipe" is that it's really just a guide. Use what you have and it will be delicious.


Sangria Fruit Ice Cream - vegan & gluten free

Below are the volumes that I used, but the point of this recipe is really it's versatility. Have more than a cup of fruit? Add some more milk. Have less fruit but more people? Add some "regular" fruit and/or some more milk. Want a lighter ice cream? Add a second can but use light coconut milk and/or add some more fruit. Consider reserving some fruit for garnish. Mostly, though, just use what you have, and I can pretty much guarantee that no one will complain that it's not ___ enough. If they do? They're probably having a terrible day, and you may want to grant them a little leeway. And maybe a drink. 

1 C sangria fruit (I used a mix of berries)
1 (~15oz) can full-fat coconut milk
agave, honey, or sweetener of choice (optional, see below)

Use a food processor, blender, or immersion blender to fully combine the milk and fruit. Taste, and add a little sweetener if needed. Mix to combine. Chill in refrigerator for at least a couple of hours, or overnight.

Transfer chilled mix to your ice cream machine and freeze according to the manufacturer's instructions.

Monday, December 9, 2013

Homemade Jam Ice Cream - vegan & gluten free

Homemade Jam Ice Cream - vegan & gluten free

Guys, I'm sorry. Turns out Decembers are hard, even when your other person is not in Sweden. Are Decembers hard for you too? I'm going to go ahead and blame the getting-dark-early, the cold, and the crazy-work-because-it's-the-holidays. There, see? Not my fault.

ice creaming
Moving on.

Perhaps you've started eating that jam you made this summer? Perhaps some of it didn't turn out perfectly? Perhaps some of it is over-set and so stiff as to be unspreadable? Yes? Well, then do I have a solution for you!
Related Posts Plugin for WordPress, Blogger...