Wednesday, February 29, 2012

Red Pepper & Tofu Risotto - vegan & gluten free


It rained this morning, meaning no construction is happening outside today. It is gloriously quiet! A little bit of sunshine, no barking dogs, and no sledgehammers = a good day


I tried making rolls again yesterday (yes, the same as Monday), and this time I followed my bread-baking instincts. As you can tell from the title of this post, they still did not turn out as well as I wanted. I checked Cookbooker, and no one had reviewed the recipe in How to Cook Everything Vegetarian, but one person has reviewed it in How to Cook Everything. Sturlington didn't have good luck with this recipe either, which makes me feel better. 


Last night, I went with something familiar, risotto, and simply changed up the usual add ins. I loved the taste of the paella I made last week, so I used the paprika idea from that and combined it with the smokey flavor of roasted red pepper. Delicious! If you are wondering what to do with the remainder of the jar, I humbly suggest Romesco Sauce

Red Pepper & Tofu Risotto - vegan & gluten free
If you prefer the taste of fresh tofu to that of fried, simply omit the tofu-frying steps and stir in your cubed tofu at the same time as the peppers so it warms up in the rice.

1 C vegetable stock
2 C water
olive oil
1 medium onion, diced
salt to taste
1 C Arborio rice
1 C dry white wine
1 package tofu, drained and cubed*
1/2 - 1 red bell pepper, diced
roasted red pepper, diced**
paprika
fresh parsley, minced, for garnish
1/2 C finely grated Romano cheese (optional)

Bring the stock and water to a simmer in a small pot. Once boiling, reduce heat so it's just high enough to keep the broth warm. Once you've put the stock on the stove, add a couple tablespoons of olive oil to a large saucepan over medium heat. Add the onion and sprinkle with salt. Cook, stirring occasionally, until the onion is soft and translucent (about 9 minutes). Turn the heat down slightly, so it's between medium and low.

Add the rice and stir frequently until the kernel ends are transparent (about 1 minute). Add the wine and, stirring frequently, simmer until the wine is completely absorbed by the rice. Pour in a 1 or 1.5 cups of stock, and stirring infrequently, cook until liquid is absorbed and the bottom of the pan is dry. Add more stock, about 1/2 C at a time, as needed to keep the bottom of the pan from drying out.  

Meanwhile, heat up another tablespoon or two of olive oil in a large frying pan. Add the tofu. Use a spatula to flip occasionally, with the goal of getting nicely browned sides on your cubes of tofu. 

Continue to cook the risotto, stirring frequently, until the grains of the rice are mostly cooked (I test by tasting). Add paprika to taste (a teaspoon?), red peppers, and salt to taste. Cook for a few minutes more, until the rice is cooked through and no liquid remains in the bottom of the pan. Stir in tofu, cheese if using, and top with minced parsley.

We usually have a salad with ours, which is a nice contrast to the creamy risotto.

*For best frying results, you want to get out as much water as possible. I drain the tofu first in the package. Then, I place the square on a clean kitchen towel that's been folded in half. Wrap the rest of the towel around the tofu and press down to squeeze water out. Reposition the tofu onto a dry part of the towel and repeat. 

**I have a jar of roasted red peppers in the fridge that I dip into periodically for dinner. I used a chunk (maybe 1/2 a pepper??), but feel free to add as much or as little as you'd like or have on hand.


Tuesday, February 28, 2012

Not My Fault

Last night dinner... how shall I put it... did not go as planned. I blame this guy.


And, while I'm at it, this guy is also at fault for dinner.


It turns out that apparently the patio of the apartment below ours and part of ours was all rotty (yes, totally a word). So these fine fellows tore down the railing and wall yesterday and are today starting to rebuild. Unfortunately for my ears and my patience, that meant that the puppies barked and acted all protecty (also a word) most of yesterday. Luckily, today they seem to have come to grips with it, hunkered down, and are enduring.

Last night, I had grand plans for dinner. I was going to make rolls and black bean burgers and not dessert and Mr Official Taster and I were going to have a healthy and delicious dinner that I would then be able to share with all you fine people. Unfortunately, as I mentioned, it didn't quite go according to plan. I chose a new-to-me roll recipe from How to Cook Everything Vegetarian. Bittman is super reliable, so I ignored the little voice in my head giving me different advice regarding the first rise and followed his. 1.5 hours later and my lump of dough was still, well, a lump of dough. This was at about 7pm. So I introduced some heat to encourage the rise and gave it a little more time. I think it might have risen. a little. 

Meanwhile, I was preparing the burgers according to America's Test Kitchen. That bowl was going along swimmingly. Sometime after 8, I gave up on the rise and carried on with the roll recipe. I shaped little rolls, flattened them slightly, stuck them in the oven, and crossed my fingers. They did rise some in the oven, but they lost their flatness, so they were basically snowballs made of bread. And by "snowballs made of bread," I don't mean burger buns. When baked, they were smaller than my fist (which isn't huge), quite round, and...dense. I plowed on. Mixing the wet and dry burger ingredients gave me a wetter mix than I anticipated, but, at this point, it was nearly 9pm and I was hungry (Mr OT probably was too, but to his credit, he didn't complain and only laughed). To compensate for the small buns, I formed slider-sized burgers and cooked as directed. They did not stay together very well. And by "very well," I mean they barely and sometimes not at all stayed together. In the end, we ate dinner that was several hours later than anticipated and not quite the crowning achievement I had planned. At least the salad didn't somehow break on me. 


I also managed to burn my hand (I'm fine) and stub several of my toes. Good dinner prep all around, and all because of some rotting wood.

Have you had any dinner fiascos challenges recently? Do you also struggle to balance the voice(s) in your head with written directions? Please tell me I'm not the only one who's kind of a mess sometimes.

Friday, February 24, 2012

Peacock Art - free printable


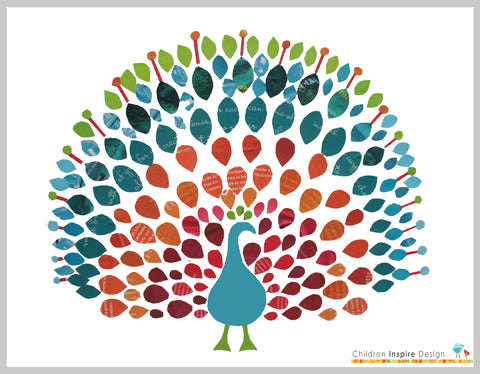
Happy Friday! Today I'm sending you over to Children Inspire Design for this fun peacock print. I love the colors! The creator may have intended this for kids, but I'm pretty tempted to print it out for myself. I think it would look good mounted on foamcore and the edges painted (like here) in teal or that poppy orange.

I hope you have a great weekend. If you're into the Oscars, Jess over at How About Orange has both quizzes and bingo for you. Enjoy!

Thursday, February 23, 2012

Spinach Paella with Lemon - vegan & gluten free


Some of you lovely people who took my survey last month indicated that you wanted to see more savory dishes. Apparently you also have trouble answering the age old question, "What's for dinner?" You may have noticed this month that there have been more non-dessert recipes appearing here, like chili, pasta, a snack, and a salad


I have also done some revamping of the recipe index, and I've gone back through my old posts checking and updating tags. The big addition to the index is at the very bottom, where, if none of the titles caught your fancy, you can browse by tag. I have you all hooked up to view recipes by diet, dish, event, or season. So, for example, you can look at all recipes I've tagged as dairy free, or breakfast, or birthday, or winter. Have a look and tell me what you think. I love comments or emails and always respond!


I have found that I've enjoyed the challenge! It's been fun to try out new recipes, and it's helped diversify dinner for me and Mr. Official Taster. This paella recipe is both easy and delicious. There's also some downtime involved (i.e. when it's in the oven), which I used to panic because I didn't have an idea for a side and then give up and decide we didn't really need one. Salads are my go-to side, but since there was already spinach involved, I was stymied. Clearly, I need to branch out. Good thing there are still a few cupcakes.

Spinach Paella with Lemon - vegan & gluten free
adapted from How to Cook Everything Vegetarian

This worked well as our main course, but it would also work as a side. If you're having a meat dish for dinner, the rich and smokey flavor means it can hold its own. 
As written, this recipe served two of us for dinner. Simply double to make 4-6 servings.

1 C brown rice*
2 C vegetable stock or water
Approx. 1/2 lb fresh spinach, coarsely chopped
Salt and freshly ground black pepper
Olive oil
Minced zest of 1 lemon
1 medium onion, diced
1 Tbsp minced garlic
1 Tbsp tomato paste
Large pinch saffron threads (optional)
1 tsp smoked or other paprika
Minced parsley for garnish

In a small pot, bring several cups of salted water to a boil. Stir in the brown rice. The water should return to a boil almost immediately, and turn the heat down so that the rice is boiling along nicely. Don't stir the rice again, and leave it to cook for 12ish minutes. Pour off the water and reserve the rice. You can do this step up to an hour before you're ready to make the paella- it doesn't matter if the rice is warm when you add it.

Preheat the oven to 450F. Warm the stock in a pan. Toss the spinach in a bowl with a tablespoon or two of olive oil, lemon zest, and salt+pepper.

Warm about 2 Tbsp olive oil in an oven-proof 10- or 12-inch skillet over medium high heat. Add the onion and garlic, sprinkle with salt and pepper, and cook, stirring occasionally, until the vegetables soften, 3 to 5 minutes. Depending on your stove, you may need to turn the heat down to medium so things don't brown or cook too fast. Stir in the tomato paste, saffron if you're using it, and paprika and cook for another minute or two. Add the rice and cook, stirring occasionally, until it's shiny. (I know this sounds strange, but it really does get shiny, trust me). Pour in the warm stock, turn off the heat, and stir until just combined.

Put the spinach on top of the mixture (it's supposed to be fluffy. It will cook down) and scrape out the bottom of the bowl (you wouldn't want to miss any zest!). Put the pan in the oven, uncovered, and roast for 15 minutes. Check to see if the rice is dry and just tender. If yours is still somewhat wet like mine has been, cook for another 5 minutes. If it's dry but the rice is uncooked, add a small amount of stock, wine, or water. When the rice is ready, turn off the oven and let it sit for at least 5 minutes and up to 15 minutes.

Carefully (it's very hot! and heavy!) remove the pan from the oven and sprinkle with parsley. If you like, put the pan over high heat on the stove for a few minutes to develop a bit of a bottom crust before serving.

*You can, of course, use white rice. If you do, you can skip the precooking step and add it directly to the pan.

Wednesday, February 22, 2012

Chocolate Avocado Cupcakes - vegan


Even though I had grand plans to see the beach over the long weekend, both Mr Official Taster and I were a bit under the weather. So, no beach. Instead there was a lot of bad tv (Netflix makes it too so easy!), nose blowing, and general hibernating on the couch.


However, I started feeling better on Monday, and yesterday I was ready. Cupcakes cure a lot. And these count as healthy, for the same reason that carrot cake does - they are fruit/vegetable based. Clearly, being made of avocado, they have lots of vitamins and antioxidants and good fat and healthy stuff. I know, I know, you are thinking how bizarre it is to have avocado in a chocolate cupcake. Kaitlin over at Whisk Kid claims she can't taste the avocado, even in the frosting. I agree that I can't taste it in the cupcake by itself, but I think it's there in the frosting. But it's ok that it's there. Because it's gooey and yummy all together. Avocado frosting is a lovely spring green, which might come in handy to celebrate St. Patrick's Day next month. If you just can't handle the idea of avocado frosting, I suggest you try some mocha frosting.


Avocado Cupcakes - vegan
adapted from Joy the Baker

I successfully halved both this recipe and the recipe for the frosting and made 12 cupcakes. It seemed like a better idea for just the two of us. This same recipe can also make a cake! Check out Joy's post for cake-specific directions.

3 C flour
6 Tbsp cocoa powder
1/2 tsp salt
2 tsp baking powder
2 tsp baking soda
2 C sugar
1/4 C vegetable oil
1/2 C soft avocado, well mashed, about 1 medium avocado
2 Tbsp white vinegar
2 tsp vanilla extract
2 C water

Preheat your oven to 350F and line cupcake tins (24). 

In a medium bowl, whisk together flour, cocoa, salt, baking powder, and baking soda. For the smoothest batter, sift the ingredients together prior to whisking.

In a smaller bowl, mash the avocado and then whisk in sugar, oil vinegar, and vanilla. Once combined, mix in the water. 

Add the avocado mixture to the flour mixture all at once, whisk until mostly smooth, and then divide among prepared cupcake pans. 

Bake 18-20 minutes, or until a toothpick inserted into the center comes out clean. You can also test by lightly pressing a finger on the top of a cupcake - if it bounces back, they are ready, but if your finger leaves an impression, continue baking and check again in a minute or two. 

Remove from the oven, and allow to cool in the pan for 5-10 minutes. Remove from pan and finish cooling on a wire rack. 

Avocado Frosting - vegan

8 oz fresh avocado, about 2 small to medium, very ripe avocados
2 tsp lemon juice*
1 lb powdered (confectioners') sugar, sifted (use more for a thicker frosting)
1/2 tsp vanilla

In the bowl of a stand mixer, or in a large bowl if you're using a hand mixer, beat the avocado and lemon juice with the whisk attachment until smooth and slightly lighter in color (3-4 minutes). Be sure to scrape the sides down periodically to make sure you get all the chunks. Sift in the powdered sugar a little at a time and then add the vanilla. Beat until smooth. If not using right away, store in the refrigerator. 

*The lemon juice is critical as it keeps the avocado (and your frosting!) from browning. Fresh or bottled both work.

Tuesday, February 21, 2012

DIY - How to Make a Wedding or Birthday Card Book


or, How to Corral that Pile of Cards You Just Can't Throw Away.

Mr. Official Taster and I got married last year, and one of the perks of doing so is that your friends and family give you well-wishes and love in the form of cards (newsflash: sometimes they even come attached to a present). I wanted to keep these cards, and now that they have survived a couple moves, it seemed like a good time to do something with them more exciting that keeping them in a pile on top of the card catalog. Clearly, this concept isn't limited to wedding cards - birthdays, graduations, or any other special event might deserve a special book.

First, decide what you want to use as your book cover. I chose fabric, because we have a history of moving and because I thought it would be more durable than paper. BUT. Pretty paper also works, and might be somewhat easier to work with. Try here for some good paper instructions. If you're using fabric, be sure it's washed and dry, and iron it so it's nice and smooth.


Now, find your biggest card. In my case, the widest one and the tallest one were different, so I pulled out both. Using scrap paper, measure out a rectangle that's about 1/4" bigger on each side than your biggest card. So if that card is 5"x7", your template will be 5.5"x7.5". This is the size your book cover will be. 


Next, you need to trace that template onto whatever sort of cardboard you are using. We have had a lot of boxes hanging around lately, so I used part of one. You could also use foamcore, or the cardboard that comes on the back of note pads or legal pads. Cut out your cardboard rectangles - these are the book covers.


Lay out your fabric of choice, and decide how much you'd like to have to wrap around the cardboard. I probably could have used slightly less, but it doesn't really matter too much. At this point, you should also consider the pattern of your fabric and how you'd like that oriented, vertically or horizontally. For example, my fabric is striped, so I could choose to have the stripes going up and down, side to side, or even diagonally on my book. I went with vertically.


Now, you're going to cover the cardboard with your fabric. Make sure the fabric is face down on your work surface, and center the cardboard on top of it. I used Liquid Nails to adhere the fabric to the cardboard, and it worked well. It's also what I happened to have on hand, so there are certainly other options out there. The downside of using Liquid Nails was the looong dry time, so something like hot glue would be way faster. Start by glueing the long sides. (this process is a lot like wrapping a present, if that helps) Then I actually used some packing tape as an additional hold-down, which you can see better in some photos a little further down.


Just like wrapping a present, once you have smoothly secured the long sides, fold in the edges on the short side.


You want to make these folds as tight and flat as you can. Here's another angle to help you visualize all this.


Put some glue in the middle of the short side, and then fold the fabric up and over. Again, keeping it as tight and flat as possible. Repeat with the last side, and then I taped down the edges of the fabric as part of my flattening. 


Allow your glue to dry completely, according to the package instructions. I left mine under some heavy cookbooks for a while to help things stay flat. Depending on the type of glue you use, this step may or may not be necessary.


Next up: making the pockets. I looked at the inside of the book cover (where all the folded fabric is) and determined how much of it I should cover with the paper pockets. In my case, the original cover template was a pretty good size, since fabric had increased the overall dimensions of the cardboard. That also meant I knew the cards would all fit. So I traced what would become the back of the pocket on a piece of scrap paper (the one on the left, below). I measured to between 1/2 and 1/3 of the way up from the bottom to determine how high I wanted the pocket to come. (There wasn't enough room on the original piece, so I ended up making the pocket on a separate piece of paper and then taping them together.) Make sure the total length of the back+the pocket is not longer than the piece of paper you are using to create the pocket. I used a 12x12 piece of cardstock, so my total length was 12 inches. Finally, use your ruler to add on tabs to the back of the pocket. These will be what connect the back and the front. If you angle the ends, the finished product will look neater.


Cut out your template and double check that your largest card(s) will fit inside the pocket.


Trace your template onto your pocket paper. As I mentioned, I used a 12x12 sheet of cardstock. They are available in about a million colors and are in the scrapbooking section of craft stores. I bought three sheets- one each for the front and back pockets, and one extra in case I totally screwed up.


Once you've cut out your pocket, you'll need to decide how to glue it all together. I used these adhesive dots rather than glue, and I'm glad I did. They were easy, no-mess, and they don't have a dry time. There are a few different brands and sizes available.


Scoring the cardstock along the fold lines before you actually fold it will make those folds both easier and crisper. I don't have an official scorer tool, but a table knife and a ruler or other straight edge work quite well.


Place your adhesive on the "wings" and press the front of the pocket down firmly. Repeat those steps for the second pocket. If you are using glue, pause here until the glue is completely dry.


Almost done! I used thick ribbon (1.5" wide) to connect the front and back covers. Place your two covers side by side and lay some ribbon down. Don't attach it yet!


Put all your cards in the pockets. Place the pockets on top of each other. Then, to see how big to make your book, place the pockets on top of the laid out ribbon. Figure out how much ribbon you need to reach around the books, and how far that means the covers need to be apart.


Cut two pieces of ribbon to that length. Lay out your book to make sure it all works before glueing things down.


Firmly attach the ribbon to both covers of your book. Then, attach each pocket to the cover (yes, on top of the ribbon).


Technically, you're done! You've made a book! I, however, wanted to make my a little more secure, so I opted to basically make a ribbon belt for my book. I used the same ribbon I used to bind my book and D Rings from the sewing section of the craft store. Make sure the width of your ribbon matches the width of the D Rings you choose.


Measure out and cut enough ribbon to wrap around your book. Sew two D Rings into one end of your ribbon. I tucked the very end under to make it look slightly more finished.


Finally, wrap the ribbon belt around the book and tie off.


Now you really are done!


I'm pretty pleased with how it turned out. If I was fancy, I could embellish the covers with our initials, or wedding date, or something, but, for now, I'm happy with it as-is. 


Friday, February 17, 2012

Brown Sugar Quick Bread - vegan


Happy Friday! I hope it's going well and that you have some fun plans for the weekend, especially if you're one of the lucky people who gets a three day weekend. Mr Official Taster does!


Mr Official Taster and I don't have any big plans, but I would like to go on an adventure to the beach. Specifically, the beach on the ocean. It's been a while, and when we lived in the San Diego area, we used to go all the time, which was great. So, to me, living in California means I get to go to the beach a lot. It's time.


I made this bread for the first time last week and ate it before I took pictures. That counts as a success. But when I made it again yesterday, I wanted to make it better. Specifically, I wanted it a bit lighter, but I also wanted it to have more depth of flavor. So I decreased the amount of flour slightly and then sifted the flour I did use. I increased the quantity of spices, and I also added ginger to the mix. Finally, I made sure to have my oven hot so that the batter didn't sit in the loaf pan waiting for the oven to finish heating. This bread it very easy to make, even if you don't have help. You don't need a mixer, and it only really uses one bowl. So, go, make your weekend more delicious!


Brown Sugar Quick Bread - vegan
This is delicious as written. However, if you'd like a spicier bread, there's room to increase the amount of cinnamon, nutmeg, and/or ginger. I think cardamom might be a delicious addition, especially if you like the flavor of chai.

1 C nondairy milk
1 Tbsp vinegar (I used apple cider vinegar, but any kind will work)*
2 C flour**
2 tsp baking powder
1/2 tsp baking soda
1/4 tsp salt
1 tsp cinnamon
1/2 tsp nutmeg
1/4 tsp ginger
1 C brown sugar
1/4 C unsweetened applesauce
2 Tbsp vegetable oil
1 C pecans, chopped (optional)

Preheat oven to 350F and grease and flour a 5x9-inch loaf pan.

In a 2 C glass measuring cup, or something similar, pour milk to the 1 C line and then add vinegar. Set aside.

Sift flour into a medium bowl. Add baking powder, baking soda, salt, and spices. Whisk to combine. Blend in brown sugar until most of the chunks are gone. Add applesauce and oil to the milk+vinegar mixture stir to combine.

At this point, make sure your oven is hot and your pan is prepared. Once you mix the wet and dry ingredients, chemical reactions occur that add air and help your bread rise. I think the sooner you get the batter from mixing bowl to pan and into the oven, the more of those air bubbles you capture in your bread, which results in a lighter loaf. I have no scientific proof to back me up, just intuition.

Add wet ingredients to your flour mixture and whisk until just combined. Stir in pecans or other nuts if you like. Pour into your prepared loaf pan and bake for 45-50 minutes. Your loaf will be a pretty golden brown, and the edges will have started to pull away from the sides of the pan. Remove from oven and cool in the pan for about 10 minutes. Invert pan to get your loaf out and allow to cool completely on a wire rack before slicing.

*You're basically souring your milk to make a non-dairy version of buttermilk. It needs to happen in a glass bowl or measuring cup, and it needs to sit for about 10 minutes. This works with regular milk, too, or you could use 1 C buttermilk if you like.

**All purpose or white whole wheat works here. If you want to add in whole wheat, I wouldn't substitute the whole amount. Maybe 1/2-1 C?

Thursday, February 16, 2012

Free Printable - I Love Us


I know that Valentine's Day was actually on Tuesday, but, really, this free printable from eighteen25 is perfect for oh-so-many occasions - birthdays, anniversaries, Mother's Day....you get the idea. It's also just a nice pick-me-up and comes in 4 color choices - red, this aqua, yellow, and gray, so one of them is sure to suit.

So to all of you lovely readers out there, I love us.
Related Posts Plugin for WordPress, Blogger...