Showing posts with label herbs. Show all posts

Monday, May 12, 2014

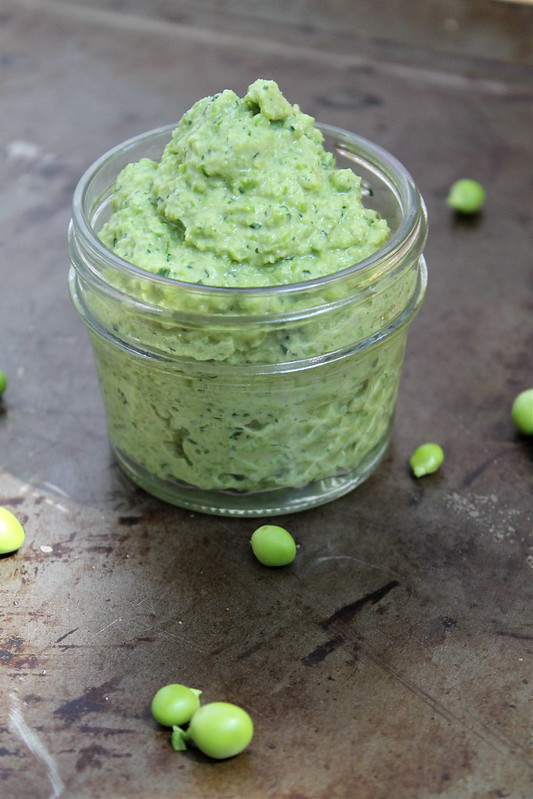
Fresh Pea Hummus - vegan & gluten free

Fresh Pea Hummus, vegan & gluten free

Hello and happy Monday! I hope the mommas out there had a good Mother's Day and felt loved and appreciated. Maybe you got a pasta necklace? or perhaps a fill-in-the-blank poem? My cousin got one that included a line about her smelling like jelly beans. That was my favorite part.
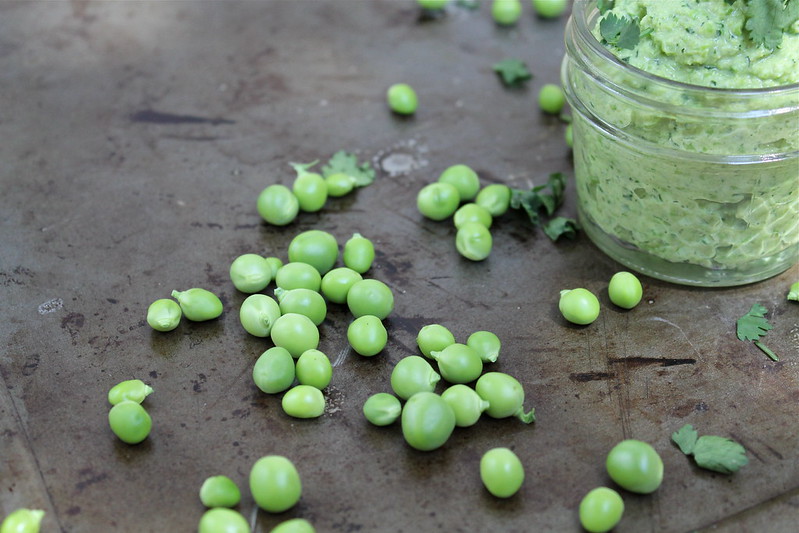
vegan/gf Fresh Pea Hummus

Now that we're fully into May, I hoping more of you out there have access to a nearby farmers' market. Perhaps you got a chance to go this weekend? (here are my top ten tips for having a great farmers' market experience) I have year-round ones available on Saturdays, but a local Thursday night one runs May-September only, and I got a chance to go for the first time last week. It felt so nice to be back! I got to check out my favorite farms and see the new booths. I learned that it's going to be a very short cherry season this year (#sadface) because winter here in the Bay Area was so weird (i.e. warm and dry). I forgot to ask if the same would be true of stone fruits like peaches, but I'd like to find that out this week (otherwise, I'm going to obsess about it, since we all know I'm somewhat in love with peaches). 
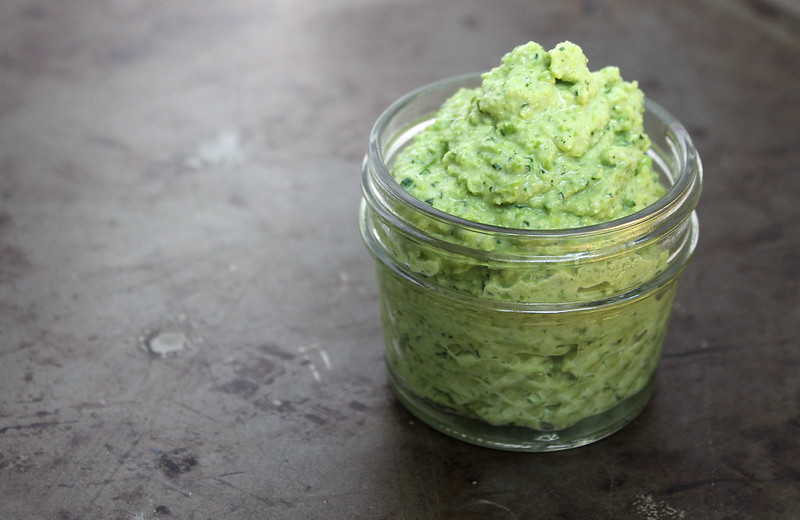
vegan & gluten free Fresh Pea Hummus

Anyway, among my purchases were my first peas of the season. Now, some people (ahem, mom.dad.) may express surprise at this since growing up I showed very little interest in peas. And I admit that they are still not my favorite vegetable in the world, but I've learned that fresh peas are dramatically better than frozen. They're sweet and tender and taste, well, pretty good. I like them raw in salads, mashed up into pesto, or, now, smooshed into hummus. Can you call it hummus if there are no garbanzo beans? 
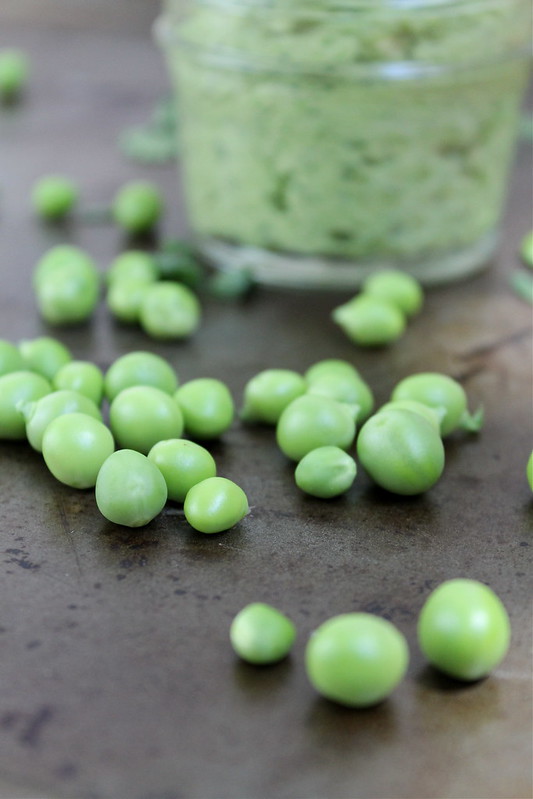
Fresh Pea Hummus - vegan & gluten free

This hummus is fast, easy, and you don't even need to turn on the stove. It's great with chips or as a sandwich topping. It's easily double-able, and if you don't have quite the right amount of an ingredient, don't sweat it. You can make it anyway, and it will still be tasty. 

Fresh Pea Hummus - vegan & gluten free
adapted from Whole Living

I think this would be good with several other variations, including using mint (or parsley or basil) instead of cilantro, or increasing only the volume of peas so that you taste them more. It's also tasty with roasted garlic in place of the raw. 

I found I didn't need to because my peas were fresh & tender, but should you wish to cook your peas, bring a small pot of salted water to a boil. Add peas and cook until tender, about 2 minutes. Drain, then run under cold water or put into ice bath to stop cooking.

1 C fresh shelled peas
1/4 C fresh cilantro
2 Tbsp tahini
2 Tbsp lemon juice
1 small clove minced garlic
1/8 tsp ground cumin
pinch of salt

In food processor (or blender), pulse peas, cilantro, tahini, lemon juice, garlic, and cumin 30 to 40 seconds. Season with salt to taste.

Monday, August 27, 2012

Parsley Pesto - vegan & gluten free

Parsley Pesto

Happy Monday! I hope you had a relaxing weekend. I had a rare Saturday off, so obviously I checked out a new farmers' market. I didn't get too much, since I stocked up at my usual spot on Thursday, but it was fun to see a new one.

Hi, my name is Kate, and I'm a farmers' market addict.

Please tell me I'm not alone.

Wednesday, June 27, 2012

Soy Sauce Marinade - vegan

tofu & veggie skewers

Is there a word for "drop dead gorgeous" that applies to the weather? Because if there is, that's what we've been having here. Mornings have been dawning bright and clear, afternoons celebrate with endless blue skies, and the evenings bring it home with cool breezes.

It didn't take too long for Mr Official Taster and I to readapt to having beautiful weather almost year round (though from what I see on FB and my weekend trip, Seattle is doing much better this year, weather-wise). And as I briefly mentioned, we finally got a grill the other week. We have been grill-less since leaving San Diego, and we're both glad to have one again. I'm glad because on grill nights, I don't do the cooking, Mr OT does, albeit one-handed right now. (He's never lonely out there, don't worry) He's glad because it's manly and gives him (another) excuse to have a beer. I mean, grills might not even work properly without one nearby, right? Plus, it's a nice change for our tastebuds. We even usually remember to close the door to keep the smoke, uh, flavor outside.

pre-marinade

Tuesday, March 27, 2012

Grow Green Onions on Your Windowsill


This is the easiest DIY ever. 
1. Buy green onions for cooking something tasty, like these.
2. Use green parts for recipe. 
3. Stick the remaining onion in a glass of water somewhere sunny or bright.
4. Change the water every few days and add more onion as you use your original purchase up.
5. The ones in the glass will grow big and strong. Cut off pieces as needed. The onions will keep regrowing.


That's it. I started these at the beginning of March, and they are going strong. The new shoots taste just as good as the originals and didn't cost me anything. I suppose eventually they will run out of steam, but by then I will have certainly gotten my money's worth!

Wednesday, March 21, 2012

Spring Herb Quinoa Pancakes - gluten free


After two days of blabbing on and on, today I bring you a beautifully simple and healthy recipe. I was able to use green onions, mint, and parsley from my own little herb collection, which I'm positive makes it tastier and healthier somehow.

Pro tip: chocolate mint might not be the best choice for this dish. It's the only kind I have on hand, though, mainly because Mr Official Taster picked it up at the nursery. When I pointed out that plain might be more practical, he responded, "But we have an ice cream maker now," and I was sold. Pushover.

Spring Herb Quinoa Pancakes - gluten free
adapted from Two Tarts

These are quite good. I've been making the full batch and cooking a few at a time for lunches. The mixture saves well in the fridge for up to 5 days or so. I think they would pair well with some sort of yogurt concoction, like raita or even plain Greek yogurt. If you're new to quinoa, this is a good how-to.

Yield: 8-10 patties
2 C cooked quinoa (approx 3/4 C dry)
2 eggs
2 Tbsp chopped green onion
2 Tbsp chopped mint (optional. I liked it better without)
2 Tbsp chopped parsley
1/2 C grated strong cheese (I used Romano)
1/2 C gluten free (or regular) bread crumbs*
1/4 tsp salt

In a small/medium bowl, mix together everything but the quinoa. Fold in the quinoa until the mixture is evenly moist.

Heat a frying pan over medium high heat and add a drizzle of olive oil. While the pan is heating, form patties using a spoon and your hand. Try to make them all a similar size for even cooking, and aim for 1/2-1-inch thick. Place in frying pan and cook, turning halfway through, about 3 minutes on each side. Don't disturb them right at the beginning, or you might encourage them to fall apart. Garnish with additional fresh herbs and/or cheese.

*I imagine that if gluten free bread crumbs are commercially available, they are super expensive. The easier and better solution is to make your own. Break up some stale bread into the bowl of your food processor. Pulse until you reach your desired texture. Store in an airtight jar. Maybe up to a month? Mine have never lasted that long.

Monday, September 19, 2011

Rosemary Olive Oil Bread - vegan


Last week in the Seattle area, it turned to fall. Cool and cloudy, with that indescribable fall feeling in the air. When I wasn't grumbling about Google, I was craving hearty, carb-loaded edibles. I wanted soft sweaters with hoods, warm socks, and blankets on the couch. I made risotto, breakfasted on burritos, and invested in some new galoshes.


For a friend's birthday on Friday, I attended a Chocolate Party. Every single dish had chocolate in it. There was salad with chocolate vinaigrette, white chocolate mashed potatoes, chicken mole, lava cakes, and homemade rocky road ice cream. Amazing. (also: why have I never thought of a Chocolate Birthday Party?!) I even saw chocolate wine, and I bet there was a chocolate stout or two. It was the perfect way to end the week, and it sent me straight into hibernation when I got home.

On Sunday, I wanted to bake and decided on this Rosemary Olive Oil bread. I've made it before successfully with Orange Peach Mango juice and lime zest. What I really wanted to make was some cranberry bread, but there aren't fresh cranberries available in grocery stores yet (the nice produce guy told me end-of-October). So it seems it's not really fall after all.

Rosemary Olive Oil Bread - Vegan
cooking spray
3/4 C juice (apple or orange. I used lemonade)
1/2 C extra virgin olive oil
2 Tbsp apple cider or white vinegar
2 C flour
1/2 C white whole wheat flour
3/4 C sugar
2 tsp baking powder
2 tsp baking soda
2 tsp dried rosemary
1/4 tsp salt
zest of 1 orange (or lemon)

Preheat your oven to 350F. Lightly grease & flour your loaf pan (mine is 10x5. 9x5 is also common).

Measure the juice into a liquid measuring cup. Add the olive oil (that brings you to the 1 1/4 C line) and vinegar.

In a medium or large bowl, stir together flours, sugar, baking powder, baking soda, rosemary, salt, and zest. Stir in the liquid mixture, adding a splash or two of addition juice if necessary. Turn into prepared baking pan, smooth top. Bake for 50-55 minutes, or until a skewer inserted in the middle comes out clean (*when cookbooks and bloggers say this, it really means "until skewer inserted in the middle comes out without any uncooked batter stuck to it").

Remove pan and allow to cool. To speed cooling, you can remove the bread from the pan once it's cool enough to handle and allow it to finish cooling on a wire rack.

Notes:
Any juice will work. You can also use a sweet white wine, and I don't see why any variety of milk wouldn't work.

You probably don't have to flour the pan, but since this was the first time I used this shiny new loaf pan and didn't want to chance it.

You can use all-purpose flour for the entire 2 1/2 C if you'd like. I just like to sneak in whole wheat when I can.

Whenever I'm zesting an orange or lemon, I am OCD about using organic fruit. I also wash it thoroughly prior to zesting.


Saturday, September 10, 2011

Freezer Burritos - vegan & gluten free

Here's a secret: Mr Official Taster and I are lazy. At the end of the day, cooking doesn't always sound awesome, and at the beginning of the day, well, let's just say neither of us is at our best. Procrastination is also sometimes involved.


So I'm hoping that the 24 burritos I made and froze today will help us avoid some unhealthy and unsatisfying choices in the future. You'll notice that the recipe below isn't really a recipe, but more of a set of guidelines. That's because exact amount and specific ingredients are really not important here. It's more important that you use delicious ingredients that you love, herbs and spices for variety, and a nice blend of flavors. I made some burritos with egg, some without; some with peppers, some without; some with pesto, some without. You get the idea. There was only about 1 hour of time involved (not counting the rice cook time), so I think the payoff will be stellar.

Freezer Burritos
This is not so much of a recipe, and more of a general idea. fyi. Feel free to make it your own. I got inspiration from here and here.

Gather your materials:
Cook some rice. I used about 1 Cup uncooked rice, 1 can of tomatoes, 1 diced onion, and 1 clove garlic. Any kind of tomatoes should work. I used whole and them chopped them up myself, but you can also just get a can of diced. I also used a bit less water than normal because the tomatoes have liquid. As far as I know, rice is pretty forgiving. As long as you have enough liquid, don't overcook it and dry it out, you can't mess it up (i.e. it's hard to have too much liquid).

Drain and rinse a can of beans. I used black. You don't have to rinse them, but my mom always says they taste better that way.

Shred (or buy pre-shredded) any cheese. Chop veggies. If you're using eggs, scramble them. Get any other toppings - potatoes, sour cream, salsa, green onion, spinach, pesto - together and ready for assembly.

Wrap a stack of flour tortillas (I don't see why you can't use gluten free wraps here) in a damp dishcloth and microwave for a minute. This helps make them pliable and not rip when you roll the burritos. While they are microwaving, rip pieces of aluminum foil off the roll and put them in a pile. You can assemble each burrito directly on top of each piece.

Make the burritos:
Place one warm tortilla on the top of your pile of aluminum foil and re-cover the stack of tortillas with the damp towel. Add your ingredients of choice. Tightly roll the burrito, and then roll it in the foil. You can label and date them with a sharpie.

Freeze them!
When you're ready to eat them, unwrap them from the foil, rewrap in a damp paper towel, and microwave 2-3 minutes on high. You can also bake them for 40 minutes at 450F, remove foil, and bake for another 10 minutes. OR you can let it/them thaw, and bake for 350F for 10 minutes.

Friday, September 24, 2010

Pesto Ricotta Ravioli

If the thought of making homemade ravioli intimidates you, read on. If not, read on anyway. It might be fun.

Saturday was a gorgeous day and the perfect afternoon for the weekly farmers' market. The one closest to me is literally down the street, about 5 blocks away, and happens twice a week. Good deal! Unfortunately, Wednesday afternoons I'm tied up at school, but Saturday afternoons usually work out. This week, Official Taster and I walked away with tomatoes, oranges, scallions, corn, grapefruit, and plums for a grand total of $12.50. I was able to put the corn, tomatoes, and scallions to work right away, and I'll be posting that recipe in the next few days. (It was fantastic. Be sure to come back for it!)

Anyway, back to ravioli. I wanted to make some, but I also was a little wary. So I got some won ton wrappers at the grocery store (they're in the refrigerated section) and used those to wrap up some ricotta-pesto goodness. After I made about 30, I froze them to help them keep their shape during the cooking. The ones I didn't cook are still in the freezer, and should be good for quite a while. I discovered that making ravioli this way is still time consuming, but probably less than making the pasta from scratch, especially since I don't have a ravioli maker. Official Taster thought the texture of the won ton was a little odd since he's used to won tons being fried, but I thought they turned out well. I might try steaming them next time instead of boiling them because they were very sticky once drained. I had to be very careful removing them from the colander and getting them to plates. The pesto sauce you see in the bottom photo? That's actually the insides of a couple ravioli that broke as I tried to unstick them.

Pesto Ricotta Ravioli
1 package won ton wrappers, found in the refrigerator section of the grocery store
1 C ricotta cheese
3 ice cubes worth of pesto, at room temperature
2 garlic cloves (optional)
1/4 C romano cheese (optional)
salt

1. Line 2 baking sheets with parchment paper. Stir together ricotta cheese, garlic, romano cheese, pesto, and sprinkling of salt.
2. Place 1 won ton wrapper on your work surface, spoon some of your mixture (approx 1 Tbsp) in the center of wrapper. Use your finger to brush water onto the edges, fold wrapper in half and line up edges, and pinch to seal. Or use a second wrapper instead instead of just one folded. Repeat with your remaining ingredients. Arrange in a single layer on your baking sheets and freeze at least 30 minutes.
3. Bring a pot of salted water to boil. Add ravioli- stir to help keep them from sticking. Cook about 2 minutes, or until tender. Drain, serve, and enjoy!

Notes:
I didn't make a sauce to go with these since I just used the insides of broken raviolis to spread over the top. This recipe is easily variable- just omit the pesto and add a different tasty amendment. If I were to make a sauce for this, I would choose something light that doesn't overpower the pesto taste. Experiment and let us know your results!

Frozen, uncooked ravioli can be stored for up to a month

Thursday, September 16, 2010

Pesto Tomato Risotto - vegan & gluten free

Risotto is a staple for Official Taster and me. I love it because it's so versatile and easily adapted to the season's vegetables. It's not something I make a lot in the summer because it does require the stove to be on for quite a while, but it's cool here in the mornings and evenings. In fact, morning air has fall's crisp edge, and nights are cool enough for a quilt.

Believe it or not, this was the first meal I've cooked in our new apartment. We moved a month ago! Cooking was such a relief! I've been subsisting on sandwiches, yogurt, and peanut butter because I've been home so little at night. I haven't baked here, yet, but I hope to soon.

For this particular batch, I used some of the pesto I made earlier this summer and some grape tomatoes that needed to be eaten. I've also used avocado, squashes, eggplant, tofu, peppers, pine nuts, and probably some others I've forgotten, as well as an assortment of fresh herbs. Risotto is also easily adapted to various diets and allergies. I use olive oil instead of the traditional butter, and the cheese is totally optional.

Basic Risotto Recipe
2 C vegetable or chicken stock
2 C water
3 Tbsp olive oil
1 medium onion, diced
salt
1 C Arborio rice
1/2 C dry white wine
1/2 C finely grated Romano cheese (optional)

1. Bring the stock and water to a simmer in a small pot. Once boiling, reduce heat so it's just high enough to keep the broth warm.
2. Add olive oil to a large saucepan over medium heat. Add the onion and sprinkle with salt. Cook, stirring occasionally, until the onion is soft and translucent (about 9 minutes).
3. Add the rice and stir frequently until the kernel ends are transparent. Add the wine and, stirring frequently, simmer until the wine is completely absorbed by the rice. Add a couple cups of stock, and stirring infrequently, cook until liquid is absorbed and the bottom of the pan is dry.
4. Add more stock, about 1/2 C at a time, as needed to keep the bottom of the pan from drying out. Cook, stirring frequently, until the grains of the rice are mostly cooked. Add vegetables/pesto/pre-cooked meat or whatever else you'd like, and cook for a few minutes more, until the rice is cooked through. Stir in cheese, serve, and enjoy!

Notes:
If you're adding fresh herbs, you can either mix them in at the very end or just sprinkle them over each serving.

For this batch, I used 3 of my pesto ice cubes (see pesto post), but more would have been better. Fewer, and the pesto taste wasn't really there.

Instead of romano cheese, you can use parmesan, or even types like mozzarella. Play around with flavors!

Thursday, September 9, 2010

Succulent Boxes

Longtime readers may remember my little succulent container gardens. Some of those were crying out for new homes, and Official Taster and I wanted to condense our plants and pots. In a joint project, we created wine box planters. It turns out that some of Costco's wine comes in wood boxes and customers are welcome to take the empties home. Perfect! After adding L brackets as added support, Official Taster added dirt, I wiggled all the plants free from their former homes, and he planted them in their new digs. (ha!)
I'm really happy with how they turned out, and I love that the boxes were free and a reuse. I think wine boxes would also work great with herbs, bulbs, mums, etc. You could even set potted plants in them.

Tuesday, September 7, 2010

Welcome To My Garden

I know, I know. I said I was back. baa-aaack even. And then I wasn't.

But here I am! Between moving and a wonderful wedding and school starting and whatnot, things here have been rather hectic. If you're a fan on facebook, you'll know that I was working on my garden the other day and promised pictures soon. These are them!

The two little raised beds hold tomatoes, peppers, eggplant, basil, lavender, and rosemary. You can't see it in the pictures, but I also have a hill of pumpkin seeds sewn, and a couple of sunflowers. The marigolds are not just cheerful; they're also a natural pest deterrent. In the next few weeks, I'll be planting some cool season crops, including spinach, lettuces, and sweet peas.

My little (dwarf) orange tree survived the move with all of the green oranges intact, so I'm looking forward to some fresh-off-the-tree citrus this winter. Official Taster and I also acquired a Passion Vine, and I'm hoping a few of it's blooms will turn into passion fruit for us to taste. I'll try to get a shot of it's unique flowers to show you.
It's still a work in progress (what garden isn't?), so I'll periodically post updates. I think it's looking pretty good, especially if you consider it started as a blank, and very dusty, slate.
Japanese Maples are my favorite tree, so I was super excited when Official Taster bought me one to plant in our new home. I hope that whoever lives here next appreciates it!

One of the things I love about living in Southern California is hummingbirds! I see them every day zipping about, visiting flowers, trees, and feeders. Usually I know they're around because I can hear their wings. Once in a while, one of the little guys actually sits and drinks. I always sort of hold my breath and try not to scare them away. I'm glad I was able to actually get photos!


While I was investigating the Mandevillas, hunting for the perfect shot, I came across this little moth hiding from the sun inside a blossom.
I have a few more photos from the garden for you in my next post, so stay tuned!

Friday, August 6, 2010

Pesto! Pesto! Pesto!

I hope you have an abundance of herbs right about now. It's that time of year, and so I put my basil to their most delicious use - pesto! It's very easy to make, freezable, and a great reminder of summer in February. I froze mine in an ice cube tray. That way, I can enjoy it in the exact portion I need. It didn't come out as cleanly as I wanted, so next time I'll try spraying the tray with cooking spray. Pine nuts are pretty pricey, so you can substitute walnuts or cashews. I hear spinach is good for you, so I added a couple handfuls. I can't taste, smell, or see a difference from other batches of pesto I've made. If you don't want to use spinach, though, just use more basil. Looking for a dairy free version? Just omit the cheese.

If you're anything like me, after you scrape the bowl clean with a spoon, you'll rip up a piece of bread to get the last drops.

Pesto
4 oz Romano or Parmesan cheese, cut into 1 inch pieces
3-4 garlic cloves
2 C tightly packed fresh basil leaves
2/3 C fresh baby spinach
1/3 C pine nuts
3/4 tsp salt
1/3 C olive oil

Using the metal blade of your food processor or blender, chop cheese and garlic. Add remaining ingredients, except olive oil, and process until combined, about 8 pulses. With the machine running, pour oil through feed tube. Process until combined. Scrape bowl and continue processing until smooth.


Saturday, June 5, 2010

Basil and Garlic Marinade

Visiting the farmers' market inspired grilled vegetables for dinner, but I wanted to do something more exciting, so I made this pretty darn delicious marinade. Part of the reason I wanted to marinate the veggies is that Official Taster and I don't always see eye to eye on which vegetables taste good. Mostly he likes things that I don't, like eggplant. and squashes. So I'm hoping this concoction (I'm writing as it's working it's magic) will help me....appreciate....the yellow squash and Japanese eggplant we picked up this afternoon. Also included: tofu, green pepper, and onion. I'll add in heirloom cherry tomatoes when we skewer everything.

As usual, please consider this recipe to be a guide, not anything set in stone. However, I would keep the proportion of oil to vinegar at about 2:1. I used avocado oil because we had just enough left, I think it works better for the high heat of grilling than olive oil, and it's something pretty readily available here in Southern California. Certainly olive oil would also work. I really like balsamic vinegar, so I chose that, but rice, wine, apple cider, etc vinegar would also work, as would lemon, lime, or another citrus juice. It just depends on what flavor you're aiming for. Fresh herbs are also up to you. I happen to have some basil growing outside my front door, so that's what I picked. Maybe later in the summer when I have more mature plants I'll try my rosemary. Also, I really like garlic, so if you don't like it as much, lessen the amount you use, because, as written, this is very garlicy.


Marinade
1/2 C avocado oil
1/4 C balsamic vinegar
8 cloves of garlic
1/4 C loosely packed basil leaves
salt and fresh ground pepper

Smoosh, chop, dice, or press your garlic. Chop or tear up the basil. Combine all ingredients, preferably in a jar with a lid so you can shake them up well.

Pour over veggies, and let them marinate for a while. Stir occasionally.

Because I'm not marinating meat, I can use the marinade again while the veggies are grilling by brushing it over them, and again over the rice I'm serving them with.

Monday, May 10, 2010

Vegan Veggie Pot Pie

I don't know about you, but I have a weakness for bakeware. It's kind of a problem because everywhere I shop I see dishes I want and imagine things I can make in them. I'm pretty good at resisting the siren call, especially for things that only make one dish or take up a lot of room. However, the other week I found myself with a gift card at a discount home store and found this pretty pie dish that called out to be set on the counter with delicious smelling steam rising from it. So I bought it. And a cookbook.
But I didn't get so many other things!

Wednesday, March 10, 2010

Spring is coming! Seeds and more


Last night and today I got my seeds started! I have a grand vertical garden plan, so hopefully these babies will sprout and grow strong and not too big. The lavender seeds I talked about in this post didn't do anything. nada. I'm not blaming the seeds (yet), but instead the fact that the day I planted them kicked off 8 days of rain. So they didn't get sun. This is my theory. I just started some more, and hopefully they will sprout. Then I can make yummy things like Lavender Extract. mmmm sounds yummy. (if it works, some of you can probably anticipate Christmas presents). On a related note, if you love gardens and gardening, check out Nadia Knows Gardens for a pretty and informative blog by my classmate.
This lovely Ranunculus was $1 this weekend and I couldn't resist! This area is somewhat known for them, mostly because of The Flower Fields, which are gorgeous in the springtime. You should visit if you get a chance!

And, finally, on a side note, I am very interested in trying out this recipe from Martha Stewart. It looks and sounds scrumptious!

Thursday, January 14, 2010

Planning Ahead


it does happen sometimes.

I just planted my lavender seeds that I got. I figured out last week that I wanted to bake some things with flowers in them for flavoring and color and overall coolness. To bake with flowers, they really need to be organic since I don't think most people (myself included) would want to eat miracle-gro or pesticides. In a handy coincidence, I got a rose plant for Christmas that's waking up on the patio in a planter full of organic soil. Regular garden stores (or super stores) don't sell lavender seeds, I discovered, just plants that are definitely not organic. So I went online and found "French Perfume" seeds at Shepherd Seeds as suggested by a helpful garden center guy. They are sitting in their organic soil on my kitchen windowsill. Hopefully waking up from hibernation soon!
Related Posts Plugin for WordPress, Blogger...