Showing posts with label wedding. Show all posts

Tuesday, February 21, 2012

DIY - How to Make a Wedding or Birthday Card Book


or, How to Corral that Pile of Cards You Just Can't Throw Away.

Mr. Official Taster and I got married last year, and one of the perks of doing so is that your friends and family give you well-wishes and love in the form of cards (newsflash: sometimes they even come attached to a present). I wanted to keep these cards, and now that they have survived a couple moves, it seemed like a good time to do something with them more exciting that keeping them in a pile on top of the card catalog. Clearly, this concept isn't limited to wedding cards - birthdays, graduations, or any other special event might deserve a special book.

First, decide what you want to use as your book cover. I chose fabric, because we have a history of moving and because I thought it would be more durable than paper. BUT. Pretty paper also works, and might be somewhat easier to work with. Try here for some good paper instructions. If you're using fabric, be sure it's washed and dry, and iron it so it's nice and smooth.


Now, find your biggest card. In my case, the widest one and the tallest one were different, so I pulled out both. Using scrap paper, measure out a rectangle that's about 1/4" bigger on each side than your biggest card. So if that card is 5"x7", your template will be 5.5"x7.5". This is the size your book cover will be. 


Next, you need to trace that template onto whatever sort of cardboard you are using. We have had a lot of boxes hanging around lately, so I used part of one. You could also use foamcore, or the cardboard that comes on the back of note pads or legal pads. Cut out your cardboard rectangles - these are the book covers.


Lay out your fabric of choice, and decide how much you'd like to have to wrap around the cardboard. I probably could have used slightly less, but it doesn't really matter too much. At this point, you should also consider the pattern of your fabric and how you'd like that oriented, vertically or horizontally. For example, my fabric is striped, so I could choose to have the stripes going up and down, side to side, or even diagonally on my book. I went with vertically.


Now, you're going to cover the cardboard with your fabric. Make sure the fabric is face down on your work surface, and center the cardboard on top of it. I used Liquid Nails to adhere the fabric to the cardboard, and it worked well. It's also what I happened to have on hand, so there are certainly other options out there. The downside of using Liquid Nails was the looong dry time, so something like hot glue would be way faster. Start by glueing the long sides. (this process is a lot like wrapping a present, if that helps) Then I actually used some packing tape as an additional hold-down, which you can see better in some photos a little further down.


Just like wrapping a present, once you have smoothly secured the long sides, fold in the edges on the short side.


You want to make these folds as tight and flat as you can. Here's another angle to help you visualize all this.


Put some glue in the middle of the short side, and then fold the fabric up and over. Again, keeping it as tight and flat as possible. Repeat with the last side, and then I taped down the edges of the fabric as part of my flattening. 


Allow your glue to dry completely, according to the package instructions. I left mine under some heavy cookbooks for a while to help things stay flat. Depending on the type of glue you use, this step may or may not be necessary.


Next up: making the pockets. I looked at the inside of the book cover (where all the folded fabric is) and determined how much of it I should cover with the paper pockets. In my case, the original cover template was a pretty good size, since fabric had increased the overall dimensions of the cardboard. That also meant I knew the cards would all fit. So I traced what would become the back of the pocket on a piece of scrap paper (the one on the left, below). I measured to between 1/2 and 1/3 of the way up from the bottom to determine how high I wanted the pocket to come. (There wasn't enough room on the original piece, so I ended up making the pocket on a separate piece of paper and then taping them together.) Make sure the total length of the back+the pocket is not longer than the piece of paper you are using to create the pocket. I used a 12x12 piece of cardstock, so my total length was 12 inches. Finally, use your ruler to add on tabs to the back of the pocket. These will be what connect the back and the front. If you angle the ends, the finished product will look neater.


Cut out your template and double check that your largest card(s) will fit inside the pocket.


Trace your template onto your pocket paper. As I mentioned, I used a 12x12 sheet of cardstock. They are available in about a million colors and are in the scrapbooking section of craft stores. I bought three sheets- one each for the front and back pockets, and one extra in case I totally screwed up.


Once you've cut out your pocket, you'll need to decide how to glue it all together. I used these adhesive dots rather than glue, and I'm glad I did. They were easy, no-mess, and they don't have a dry time. There are a few different brands and sizes available.


Scoring the cardstock along the fold lines before you actually fold it will make those folds both easier and crisper. I don't have an official scorer tool, but a table knife and a ruler or other straight edge work quite well.


Place your adhesive on the "wings" and press the front of the pocket down firmly. Repeat those steps for the second pocket. If you are using glue, pause here until the glue is completely dry.


Almost done! I used thick ribbon (1.5" wide) to connect the front and back covers. Place your two covers side by side and lay some ribbon down. Don't attach it yet!


Put all your cards in the pockets. Place the pockets on top of each other. Then, to see how big to make your book, place the pockets on top of the laid out ribbon. Figure out how much ribbon you need to reach around the books, and how far that means the covers need to be apart.


Cut two pieces of ribbon to that length. Lay out your book to make sure it all works before glueing things down.


Firmly attach the ribbon to both covers of your book. Then, attach each pocket to the cover (yes, on top of the ribbon).


Technically, you're done! You've made a book! I, however, wanted to make my a little more secure, so I opted to basically make a ribbon belt for my book. I used the same ribbon I used to bind my book and D Rings from the sewing section of the craft store. Make sure the width of your ribbon matches the width of the D Rings you choose.


Measure out and cut enough ribbon to wrap around your book. Sew two D Rings into one end of your ribbon. I tucked the very end under to make it look slightly more finished.


Finally, wrap the ribbon belt around the book and tie off.


Now you really are done!


I'm pretty pleased with how it turned out. If I was fancy, I could embellish the covers with our initials, or wedding date, or something, but, for now, I'm happy with it as-is. 


Friday, November 11, 2011

The Wedding - Part I


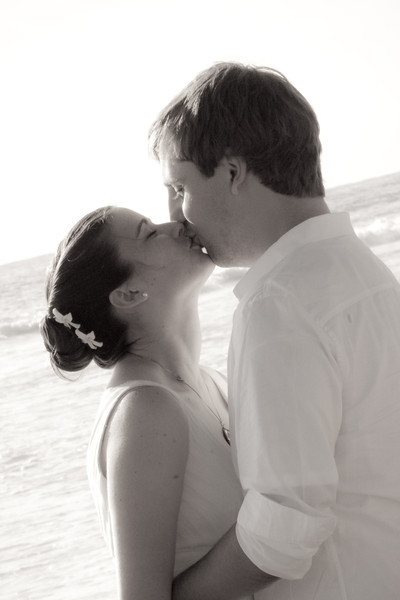
I know I promised some stories of my busy October, but in order to do that, I have to first start in July. On July 22, 2011 Mr. Official Taster and I got married (yay!) on the beach in Southern California. It was an intimate affair- only immediate family attended (if you don't count the strangers on the beach!) -and it certainly fit the definition of "short and sweet."


The ceremony was really, really short. But I loved it. We wrote the whole thing ourselves, and a good friend officiated. What I remember is that he basically said "welcome" and "you may now kiss the bride." He said some other stuff, too, but I couldn't tell you what. Although I can tell you that I vetoed the whole "does anyone object?" part, not because I thought someone would, but because I just don't like it.


We promised, of course, to love each other, but also to fill our shelves with books, buy flowers, hold hands and be nice to each other. We also promised to have and to hold each other much the same way people have been doing for hundreds of years all over the globe. Having that feeling of continuity within our unique ceremony was really important to me. We laughed, he cried, but I didn't, much to my surprise.


Following our ceremony, and some pictures, we had dinner at one of our favorite restaurants with about 25 friends and family followed by delicious local pie and adorably delectable cupcakes from a a local bakery.


It was wonderful to catch up with friends we hadn't seen since we moved, and, frankly, to celebrate us. Dinner was a relaxed, couple-hour-long affair. We tried to talk with all of our guests, but, inevitably, felt like we didn't have enough time with any one individual. I'm pretty certain that's normal.


Finally, after the ceremony, photos, dinner, and drinks at a couple of bars, a friend drove us back to our B&B. After a wonderful, joyful, important day, we were able to relax and just be alone with each other. We talked about who we chatted with and how things went, and generally reveled in the beautiful day. I felt so lucky to have family (immediate and extended) who put up with our non-traditional wedding day and friends who came to dinner to celebrate with us.


You may be wondering why I titled this post "the" instead of "our." In the past year or so, I've become a devoted reader of A Practical Wedding (and I think you should be too, even if you're not planning a wedding), and one of its (many good) messages is that your wedding is not just about you. Not only do I think that's true, I think it's not talked about enough on most traditional wedding blogs. 

Anyway, all weddings, and, I think, especially weddings that don't follow a "traditional" or the "Wedding Industrial Complex's"idea of normal, require a little extra give from those we love. I know that we hurt some people with our choices, but we tried our best to balance what we wanted, what we needed, and what others wanted or expected. So while it was technically OT+my wedding, it was also our parents' and siblings' and friends' etc. etc. etc. "Our" just seems like too little of a word to encompass the community that it refers to here. 


Several of my (unmarried) friends have asked me if it felt any different to be married. At first, I didn't think so. But their queries made me think about it, and my answer changed to "yes." It seems like a little thing: I like having a respectable title for this other person in my life. I've never liked the term "boyfriend,"and "fiance" never really grew on me. I'm not comfortable yet with "husband," but it's a handy term. It sounds right to plead out of a social event because you need to spend time with your husband, or leave early from work to pick up your husband from the airport/doctor/county fair. Saying those same things about your boyfriend just doesn't sound as legitimate. In the general public eye, a "boyfriend" is just not as important or worth scheduling around as a husband. 

That may seem like a silly benefit at first. But consider all the other people who don't get to have that official spousal term to use. I've always been pro-marriage equality or gay marriage or however you phrase it. But getting married actually made me feel more strongly about it because I got to get married. I'm glad to see the tide seems to be turning, but there's still miles to go before we sleep.


What did this day in July have to do with a busy October?  Here's a hint: lots of flights were involved. and more friends, family, love, and mimosas.

For those of you who care about these things:
I put the flowers together at the local farmers' market a few days before the wedding. That's where the henna came from too.
My dress came from Ann Taylor.
We got our rings from the wonderful people at Minter & Richter.
Our fabulous photographer, Riz, is a former colleague of Mr Official Taster and I can not say enough good things about him (and his wife! she helped too). See more of his work here.

Monday, February 21, 2011

DIY Wedding Cupcakes

Meringue Bouquet Cupcakes

Today's lovelies come to you via Martha Stewart Weddings. I can't think of too many better ways to start off a Monday morning than a whole gallery of pretty cupcakes! These all include recipes, too, so if you want to make these for fun, for a party, for a friend, or for your very own DIY wedding, you can. Recipes, directions, and helpful hints included.

Mocha Cupcakes with Chocolate Glaze

Thursday, February 10, 2011

One Pretty Thing


Literally! I was lucky enough to be included on yesterday's Valentine Round Up on One Pretty Thing. There you can always find daily crafty inspiration, and my cupcakes from Monday made the list! There's also One Pretty Wedding for those of us looking for nuptial inspiration.


Some of you Etsyers with eagle eyes may have noticed that I raised my shipping rates on Short & Sweets slightly recently due to cost increases. Well, the other pretty thing about today is that I figured out how to lower those, so my rates are back down to where they were before. Huzzah! It's too late for you to receive anything in the mail for Valentine's Day, but next week when you have a fudge or an oreo craving, come visit!

Monday, January 24, 2011

DIY Wedding Cakes


Martha Stewart Weddings claims these beauties are DIYable for your (or someone else's) wedding. I think that might be true if you're already artsy, crafty, bakey, etc. However, as one of the recently engaged, I'm not so sure, even though I am already artsy, crafty, bakey, and kind of an overachiever. What do you think? Is it crazy for a bride to take on her own wedding cake?

Monday, December 6, 2010

Bejeweled Cakes


This collection of jewelry inspired wedding cakes from Martha Stewart Weddings seemed like a nice bit of pizazz for a wintry Monday morning. Enjoy!

And please take the 10-second survey if you haven't!

Thursday, September 30, 2010

A Year of Sweet Treats

I may have mentioned once or twice that a really important person got married recently. Well, I guess that makes it two important people got married. To each other.

Anyway, their wedding present (besides my wonderful presence, of course) is a year of sweetness in the form of 12 boxes of assorted cookies, fudge, and the like. Each month I'll mail their treats about the time of their wedding date- in this case, the 28th. And each month, I'll share with you what I've mailed.

We'll have to get some feedback from the bride and groom here, but I think this is an excellent idea. Personalized, sentimental, and not simply more "stuff." I mention this not to toot my own horn, but to give you a present idea, whether it be for birthdays, anniversaries, weddings, or assorted winter holidays. I also like this idea because it spreads the [insert holiday here] gifts out over time. If you're not a baker or don't have the time, simply send me an email or convo me via Etsy and we can set something up.

Have you ever given anything like this or received some sort of present-of-the-month? Was it a hit?

This month's recipe is over at Smitten Kitchen. I added dried orange flavored cranberries (in tribute to the wedding colors!) and chocolate chips, both of which I mixed in finely chopped. If you haven't ever browsed her blog, do. It's humorous, pretty, and always mouth-watering.

Saturday, August 28, 2010

Lovely Wedding Cakes

One of my best friends in the world is getting married today! I am so happy for her and her lucky groom. In honor of her wedding, I'm linking you over to Real Simple for their collection of 12 Great Wedding Cakes. Photos by Tara Donne.

Enjoy!

Saturday, August 7, 2010

Pretty Cakes!


As you may have noticed, I like pretty cakes. I've shared these and these with you, and I have a new collection today from Real Simple Weddings. Enjoy!
Related Posts Plugin for WordPress, Blogger...